
 Contents
What is a Chatbot with Multiple Choice Questions?
You can prepare different choices that customers can click on. By selecting the button of their choice, the customer will then be directed to the next step of their inquiry. We suggest you to create a Chatbot with Multiple Choice Questions based on Frequently Asked Questions to increase operation efficiency.
Concentrate on chats that are related to sales by streamlining repeated inquiries with the support bot. A well-made support bot can reduce simple repeated inquiries by more than 50%.
You can easily create any scenario you want at any time, without the need for developers or coding. You can create a support bot to particularly target VIP customers, or even set up support bots for specific pages.
Examples of Chatbots with Multiple Choice Questions
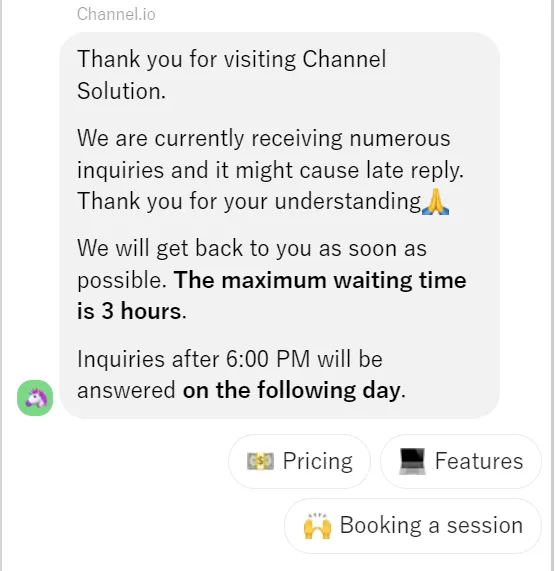
Example 1. Reduce repetitive inquiries
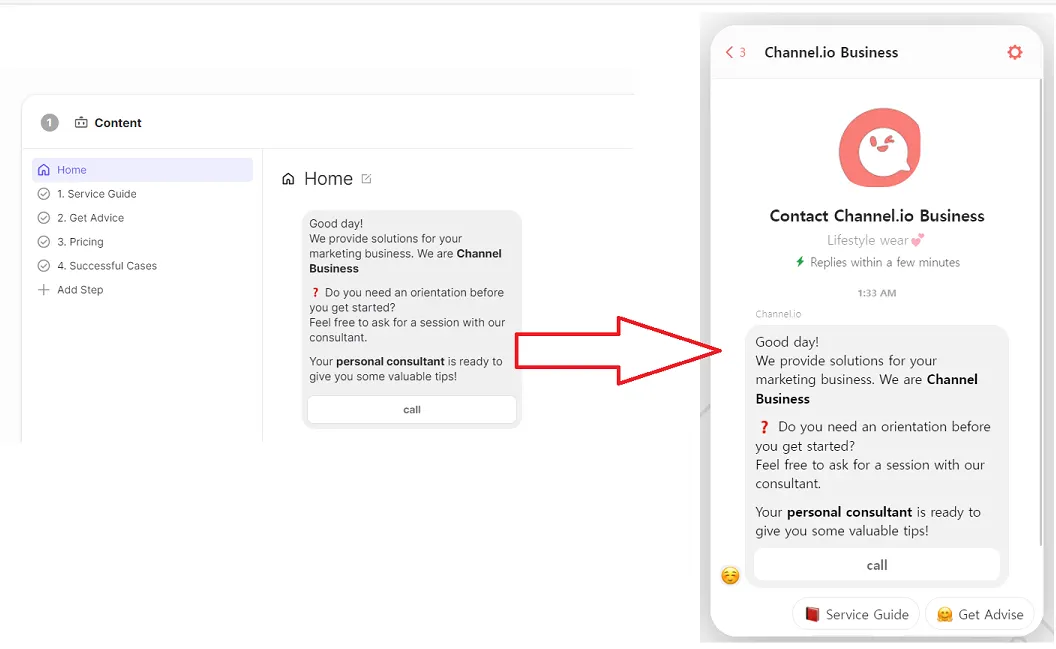
By placing buttons focusing on simple repeated inquiries located in the “Start Context” panel, customers can quickly get the answers to their inquiries.
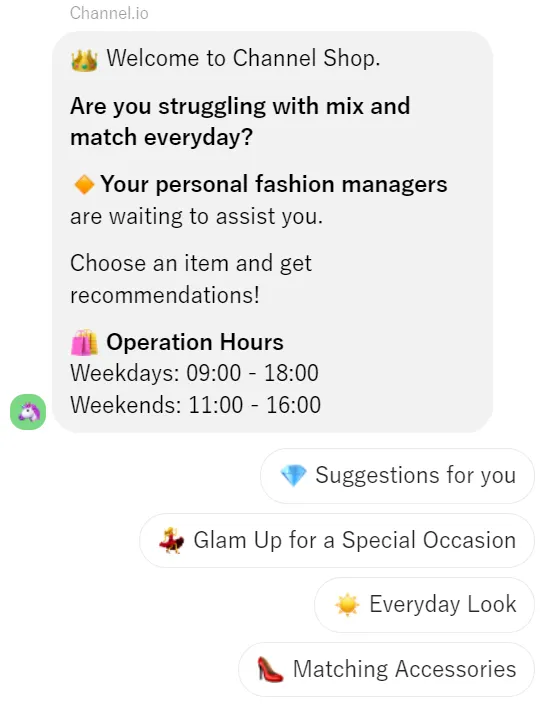
Example 2. Recommend a product
Before recommending a product, you can set up questions to understand the customer’s preferences.
We provide ready-to-use support bot templates as well
We have prepared templates that can be applied to various situations, such as improving chat efficiency and securing new sales.
We have prepared templates that can be applied to various situations, such as improving chat efficiency and securing new sales.You can modify the template content (text, link, image, etc.) according to the services you are offering.
Create Content
Go to [Operations]→ [Support Bot ]→ Click [Create a Support bot]
•
Create a link button
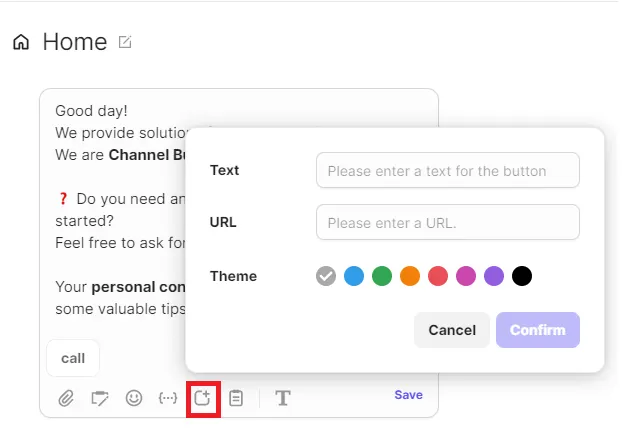
◦
Button text: Enter the content you would like to display on the link button
◦
Link URL: Enter the URL of the page that you want the customer to be directed to
You can add up to two link buttons.
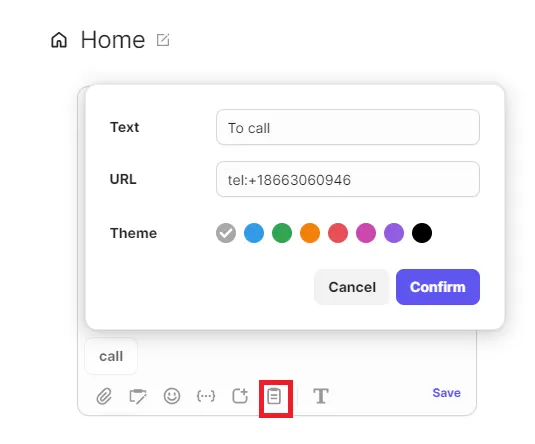
You can also create a button that allows customers who use the mobile version to make a call.
Please enter the number in the link (URL) following the format below!
- tel:+18661111111 (O)
- +1-866-111-1111 (X)
•
Use “custom attribute” to enter customer name
You can use “custom attribute” to automatically fill customer data.
Provide personalized customer experience by using the name data. For non-members, you can set up alternative text to be displayed.
•
Attach YouTube video link to play within the Support bot
If you are running a YouTube channel, you can play it within the Support bot without being directed to a new page.
If you insert the link of the YouTube video, a thumbnail is automatically displayed. If you don't want the link to be visible, you can just delete it!
“I want to apply the same [message / action ] created in step A of the support bot to step B!”
→ It is possible! Click the play button below to learn more
Learn how to duplicate [ Message / Option / Action] from previous step set up
You can check for more detailed message composition methods Click here
Click here Set up the Option
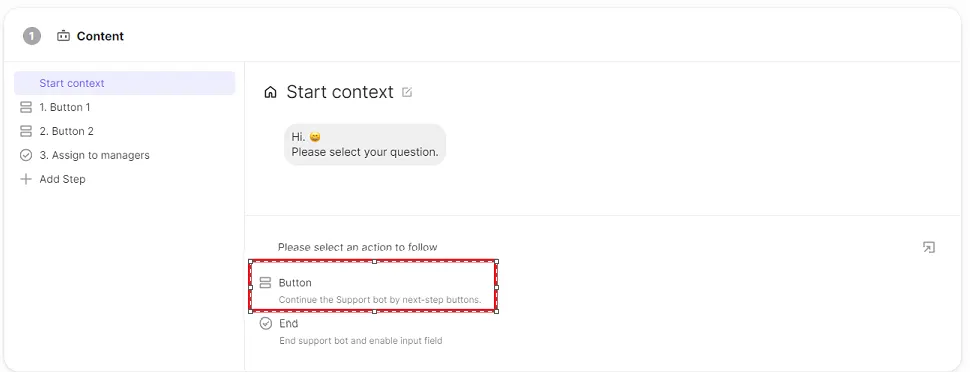
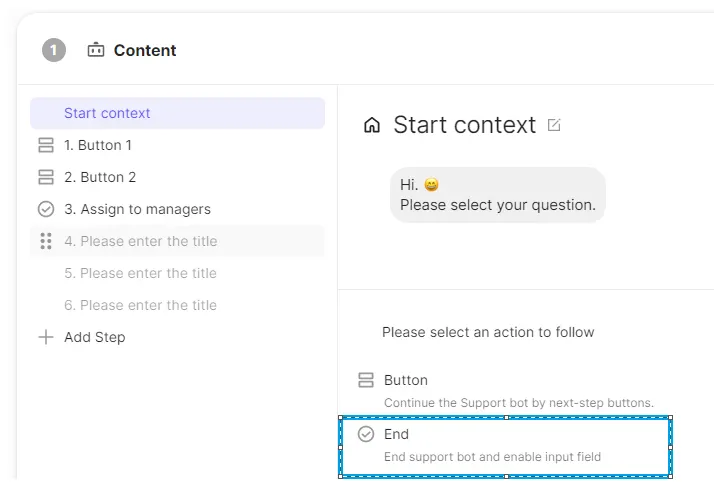
When adding the next step in Support Bot, you can select either [Button] or [End].
The start context is the first screen the customer sees when they start a chat.
•
Setting the [Button] (creates an option)
You can continue the support bot by creating a button to go to the next step.
1.
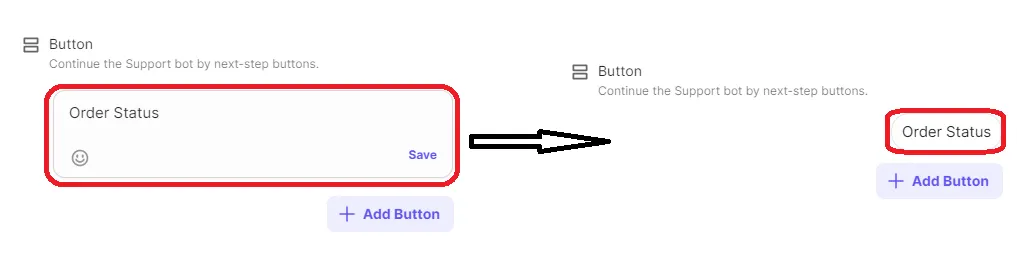
Click the [Button]
1) After entering the content of the button, click [Save]
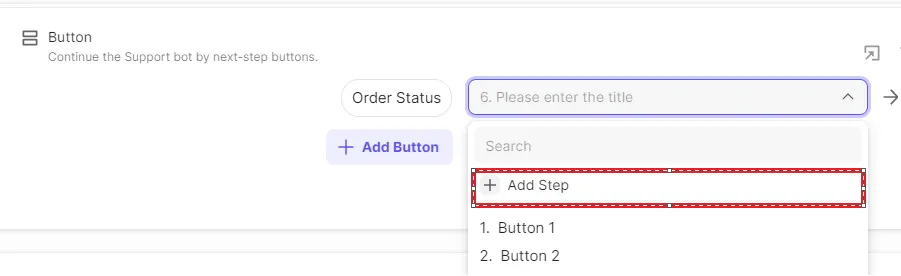
2) Set the steps to connect with the options you created
Please select the step to be connected when the customer clicks the button.

If you desire to add a new step, you can create a new one by clicking [+Add step].
Once the new step is created, go to the newly created step, set a name, and connect it with the button.
3) Click [+Add button] to create a new button
You can add up to 10 buttons.
•
Set up the [End] option
You can end the support bot to open an input window where the customer can leave a message. Depending on the operating hours, the input window display will change.
1) Enable chat during non-operating hours
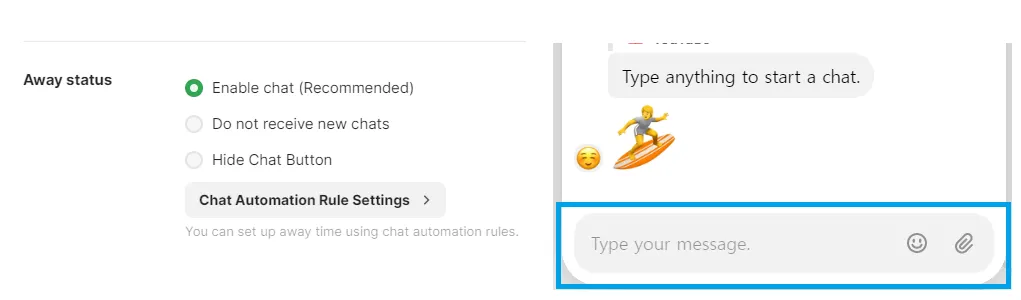
After the support bot is ended, a message input window will appear.
2)Do not receive new chats during non-operating hours
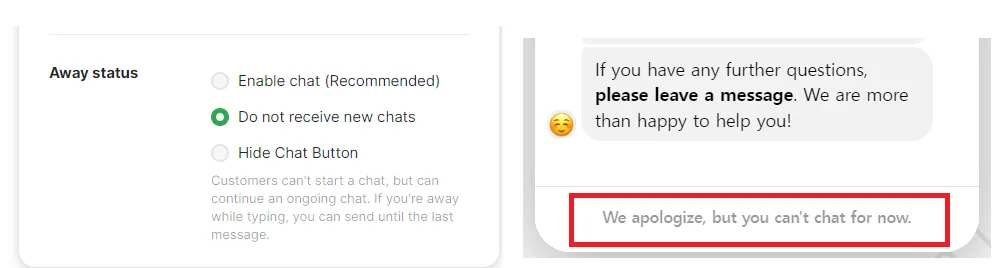
The message input window will not appear after the support bot is ended.
•
Set up an action
You can set actions, such as assigning a person in charge or automatically attaching a chat tag at the corresponding step.
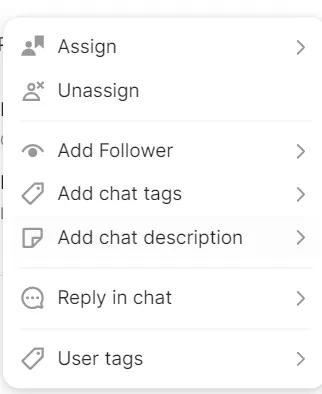
Assign
You can assign a person in charge at the corresponding step.
Unassign
You can click the unassign button if you wish to remove the person in charge.
Add Follower
If you want to add a follower to assist with customer inquiries, you can do so by clicking the Add follower button. Multiple followers can be added.
Add chat tags
Add chat tags to classify the customer inquiries.
Add chat description
You can leave a memo for specific steps
Reply in chat
An action that sends a message to a customer or in an internal conversation when a step has been reached.
User tags
This action adds a customer tag that can categorize customers.
Custom action
This is an action that sends an email/text directly from the support bot. (Coming soon)
Set up the Operation
1.
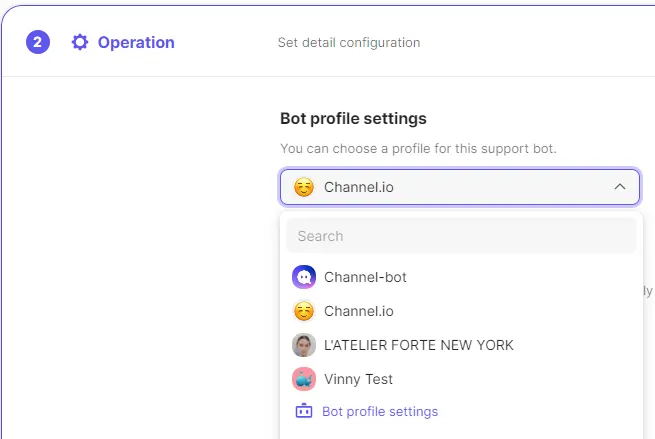
Bot Profile
Please select a bot profile to represent your brand by clicking Bot profile settings.
You can also create your own bot profile you would like to use.
To learn more about creating a bot profile(link)
2.
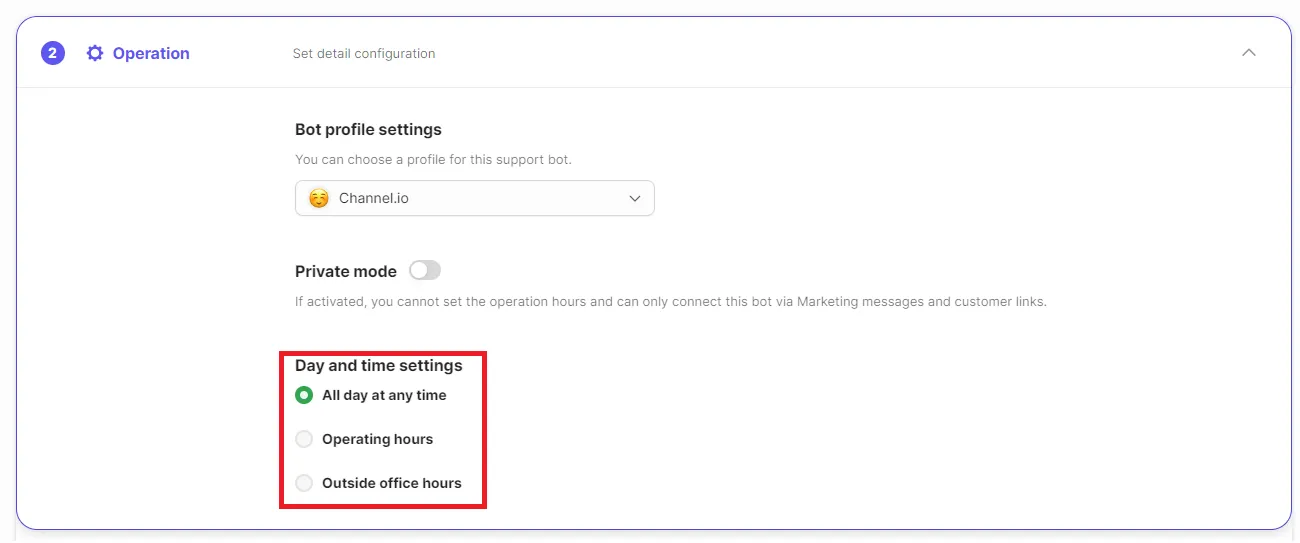
Private Mode
If you enable ‘Private Mode’, the support bot is not exposed on the website or app.
Since you can only access the link to the support bot, you can test it before publishing it publicly or use it when you want to send the support bot link to certain customers only.

Priority, support bot operating hours, and page target settings are not applied when private mode is on.
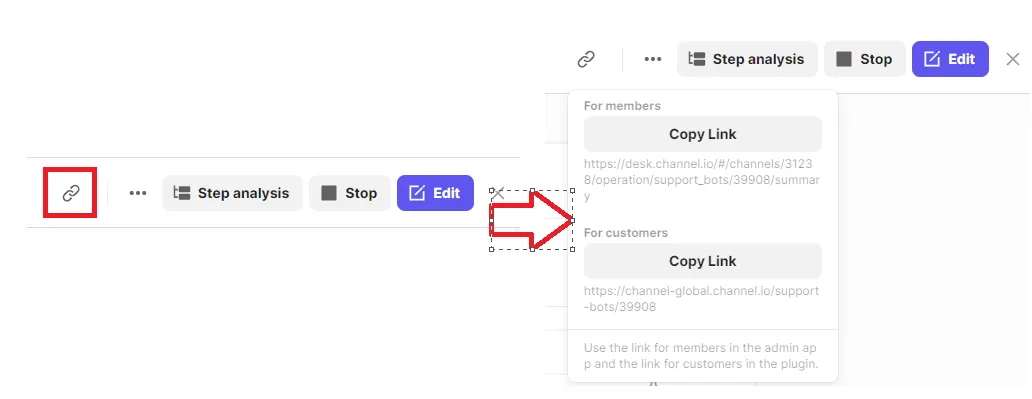
•
You can copy the Support bot link by clicking the [Clip] button in the upper right corner.
3.
Day and time settings
You can set up support bots to operate 24 hours / during operating hours only/ during non-operating hours only.
Set up the Target Page
If you want to show the support bot only in certain pages, you can add the specific page link.
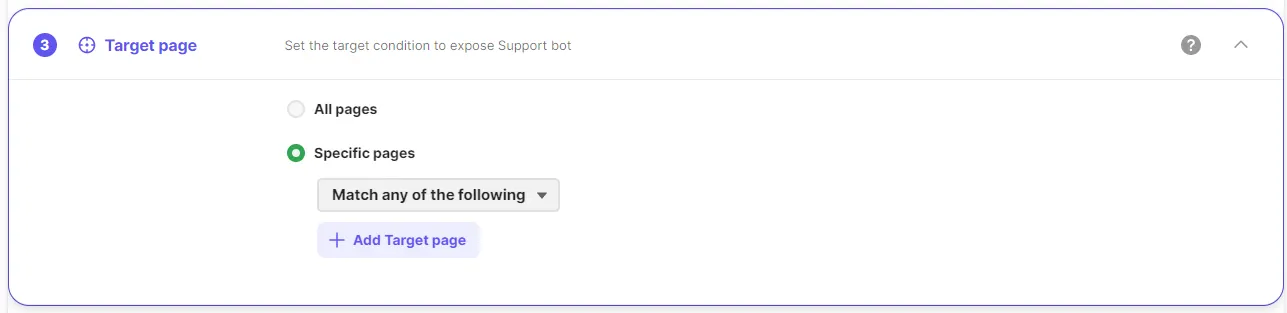
For example, you can set the basic support bot to operate on the main page and set a promotional support bot on the new arrivals page.
If there are multiple support bots in operation on the same page, only one support bot will appear following the order below:
1. Support bot with filtering option and targetting specific pages
2. Support bot with no filtering option
Set up the Filter
By adding filters, you can select the target audience. You can also import the segment you’ve created from Contacts.
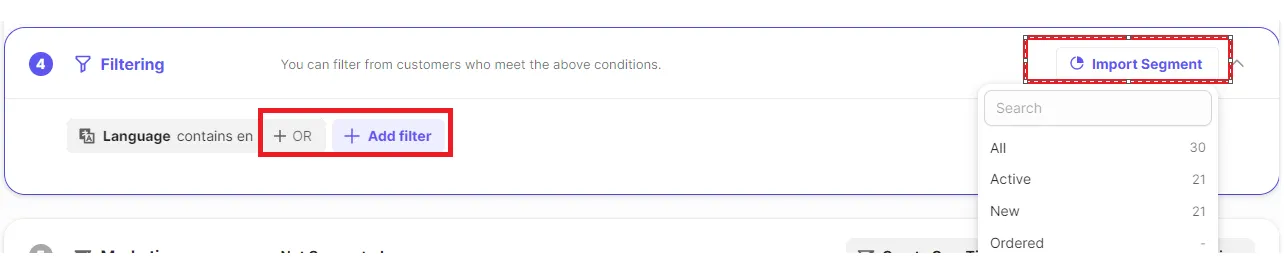
You can add multiple filters to set the specific target audience using OR & AND option.
For Example,
If you want to target customers who speak Korean or Japanese, You need to use the “OR”option.
It is not possible that browser language is Korean and Japanese at the same time, so if you set it using the “AND” option, the support bot will not be shown to the target customers.
Import Support Bot
“We are operating multiple channels, and I want to use the support bots made in channel A to channel B as well!”
→ It is possible. You can export data from channel A first then import them to channel B.
1.
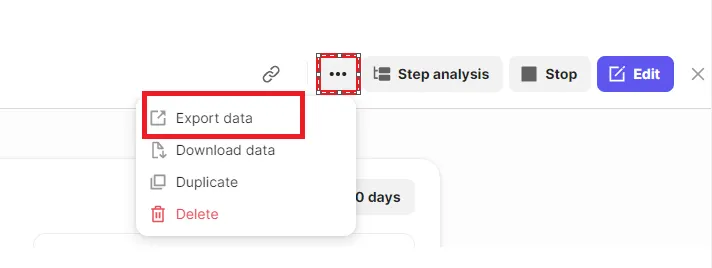
Export Support bot
Click [3 dots] on the support bot page you would like to export→ click [Export data] to download it as a json file
2.
Import Support bot
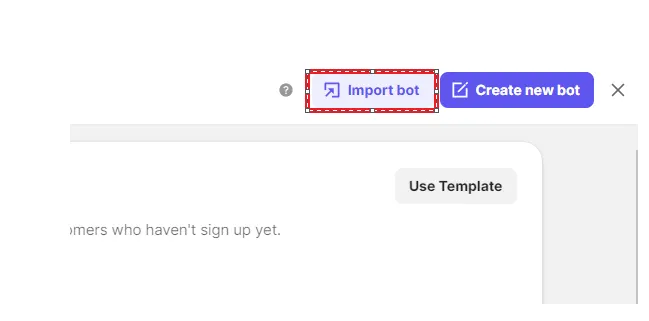
Click [+New Support Bot] → click [Import bot]
FAQ
I don’t see my support bot on my website.
Is it possible to send to the customer a direct link of the published support bot?
I want the greeting message I set up to appear first before the support bot.
