So what exactly is GTM?
•
GTM stands for Google Tag Manager. It is a free service offered on Google’s marketing platform that allows you to manage tags embedded into websites without touching any code. It is a powerful tool that supports various marketing processes.
•
When you create a marketing campaign, you can set a ‘Trigger Event’ or various additional events.
•
It's especially helpful in tracking customer actions, and will provide much more information about the customer than the website builders, where integration is limited. (For example, it can track a scroll depth of 70% down the page, and how/when customers click on their shopping carts.)
See also
•
Introduction to Google Tag Manager https://marketingplatform.google.com/intl/en/about/tag-manager/
•
Google Tag Manager support https://support.google.com/tagmanager#topic=3441530
 Contents
Installing GTM on your website
1.
Installing GTM on my website
For developers, please see https://developers.google.com/tag-manager/quickstart
1.
Create a new account on https://tagmanager.google.com/. Enter in your website’s details, and create a GTM account.
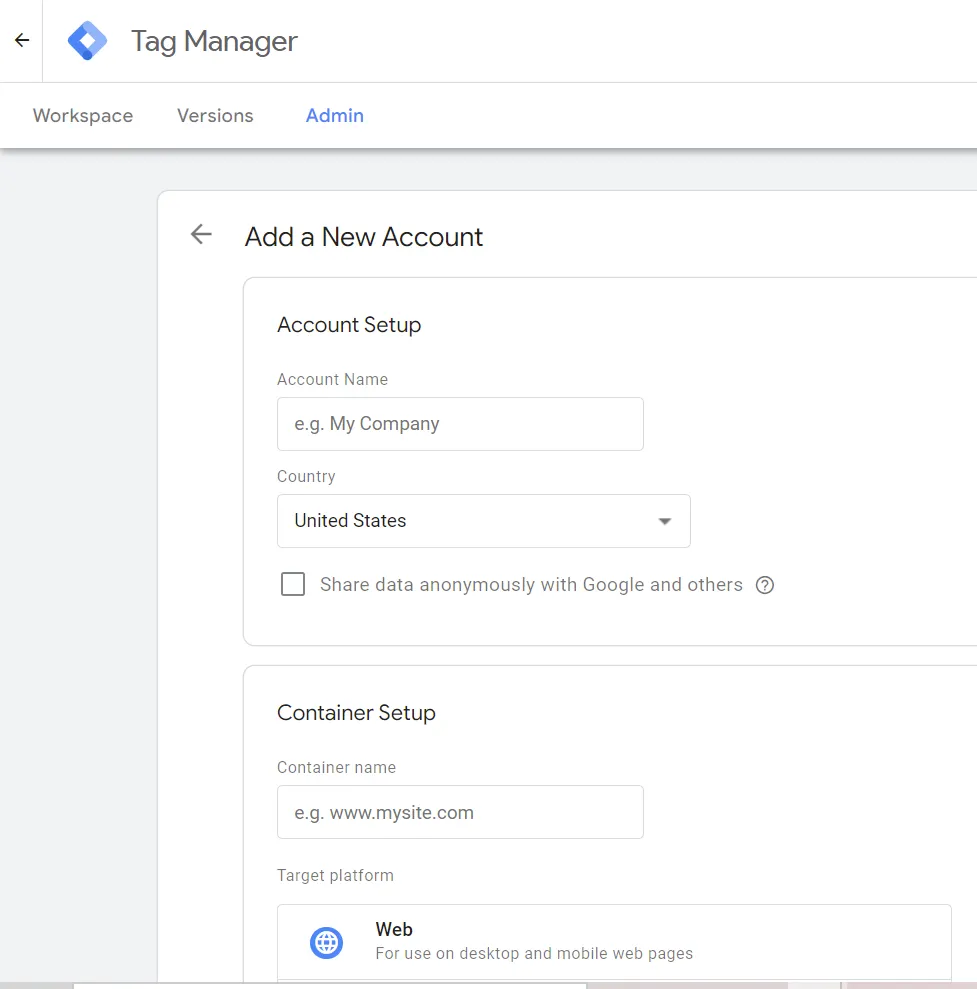
You will need to accept Google’s Terms & Conditions to create a GTM account.
2.
Copy and paste the unique GTM script into your website.
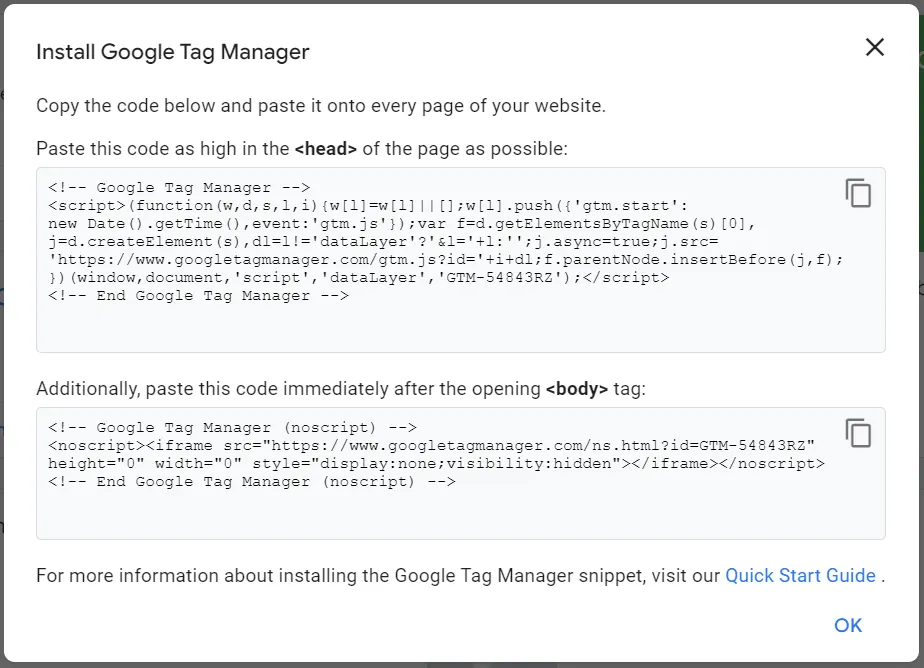
•
You will need to enter <head> and <body> scripts separately.
•
Some builder sites may provide a dedicated space to directly input the GTM script.
3.
Voila! You can now view a dashboard to manage your website’s GTM.
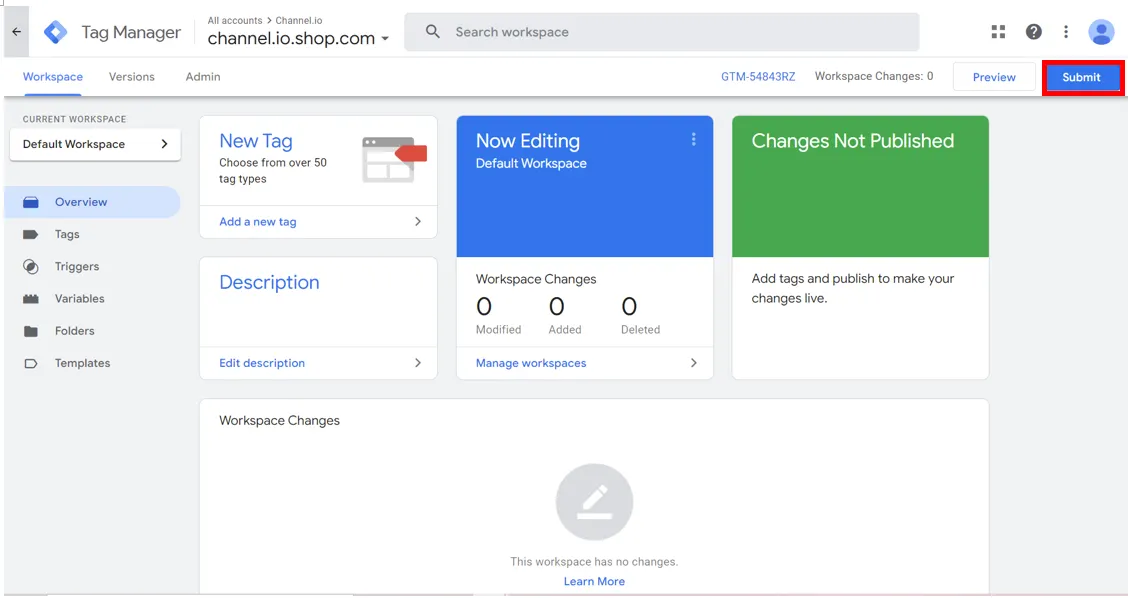
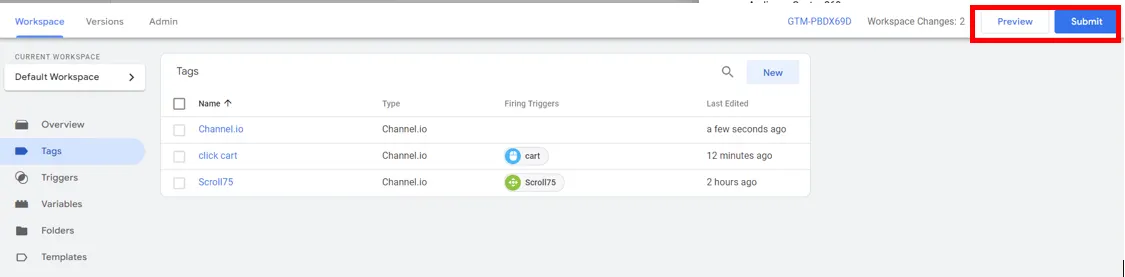
To save any changes made (such as creating new triggers), you need to press the [Submit] button on the top right hand corner of the page.
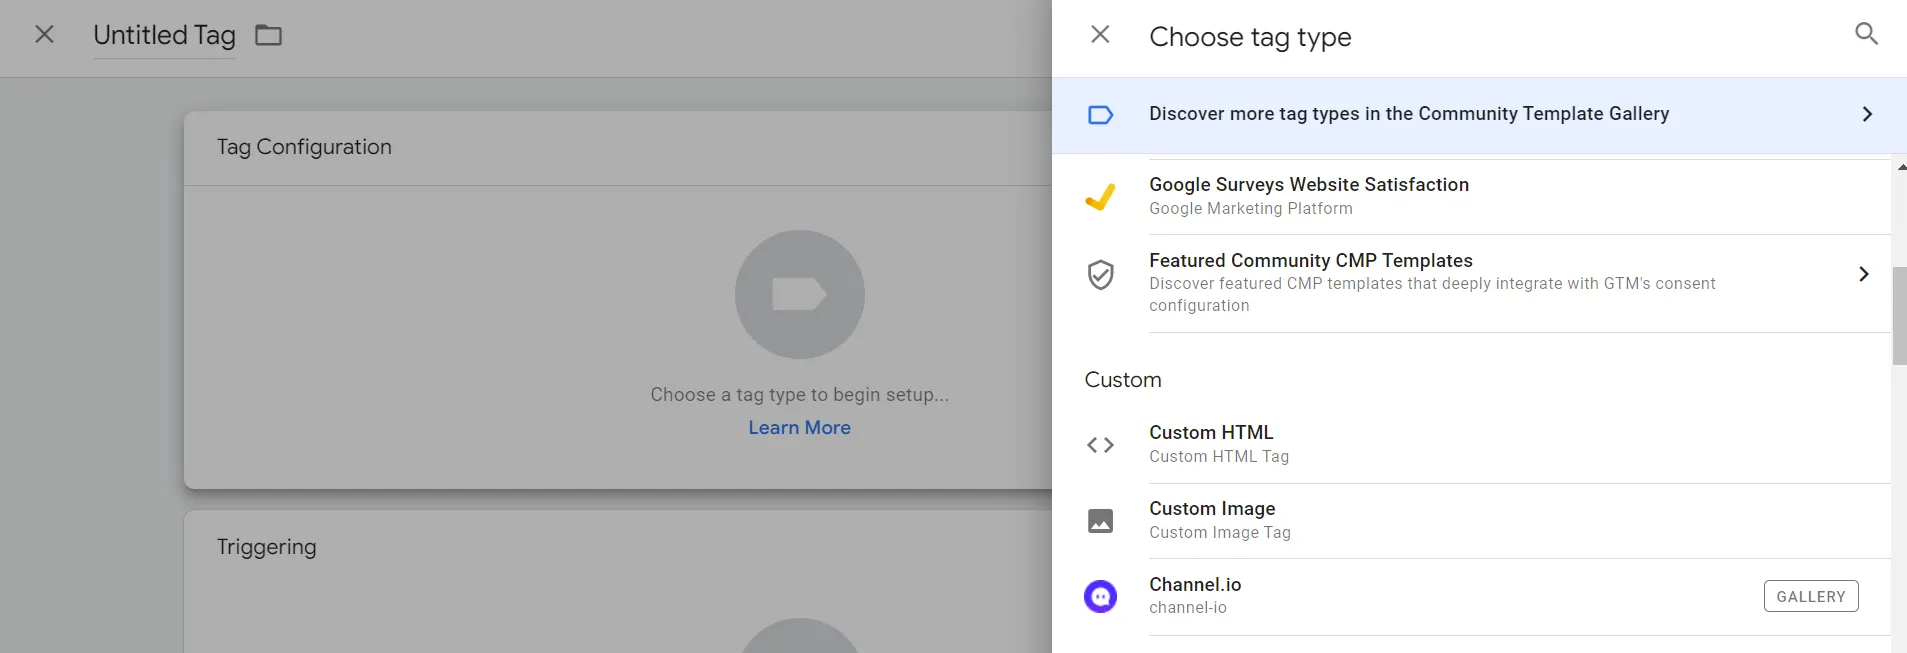
2.
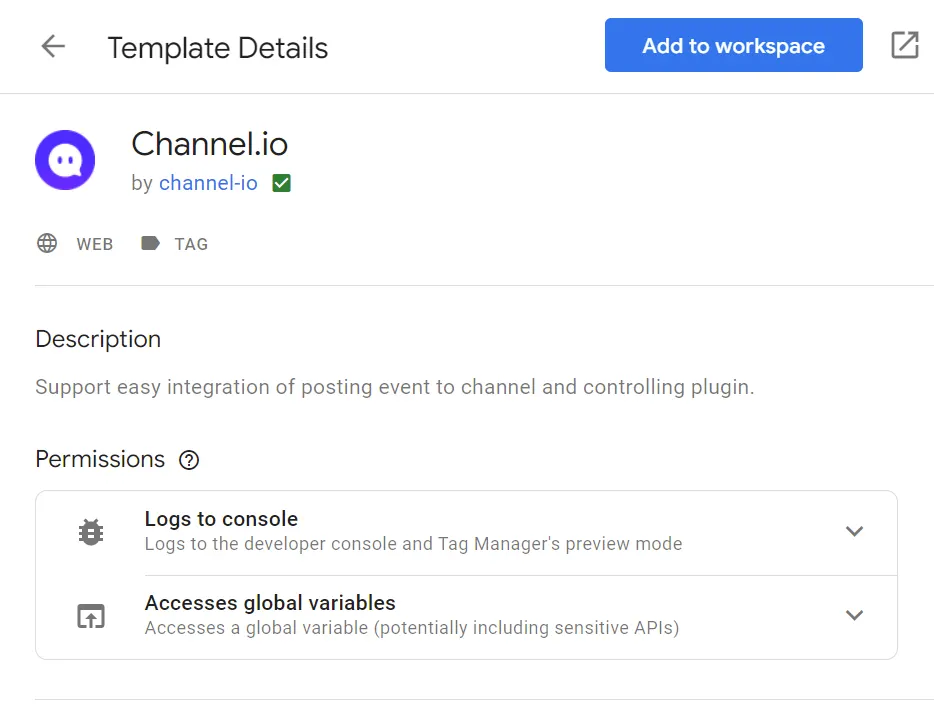
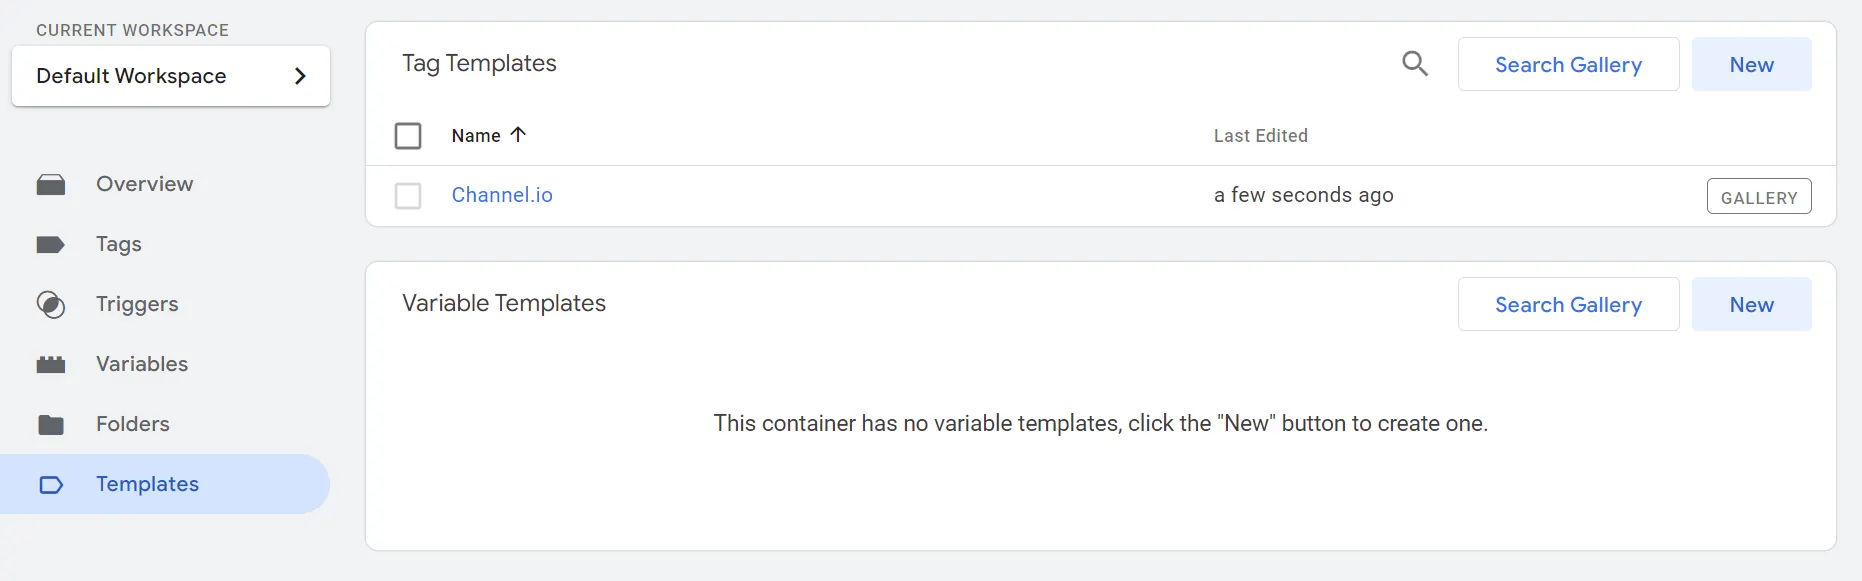
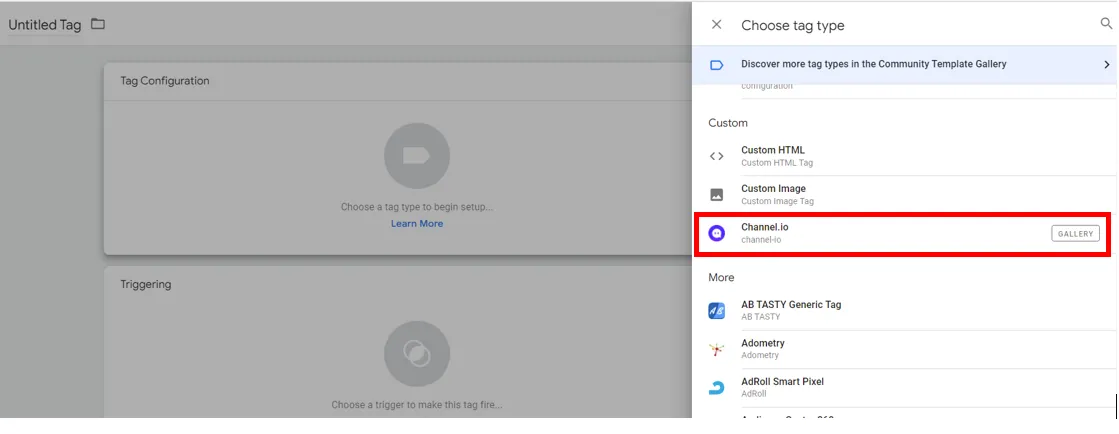
a) Select [Template] on the left menu.
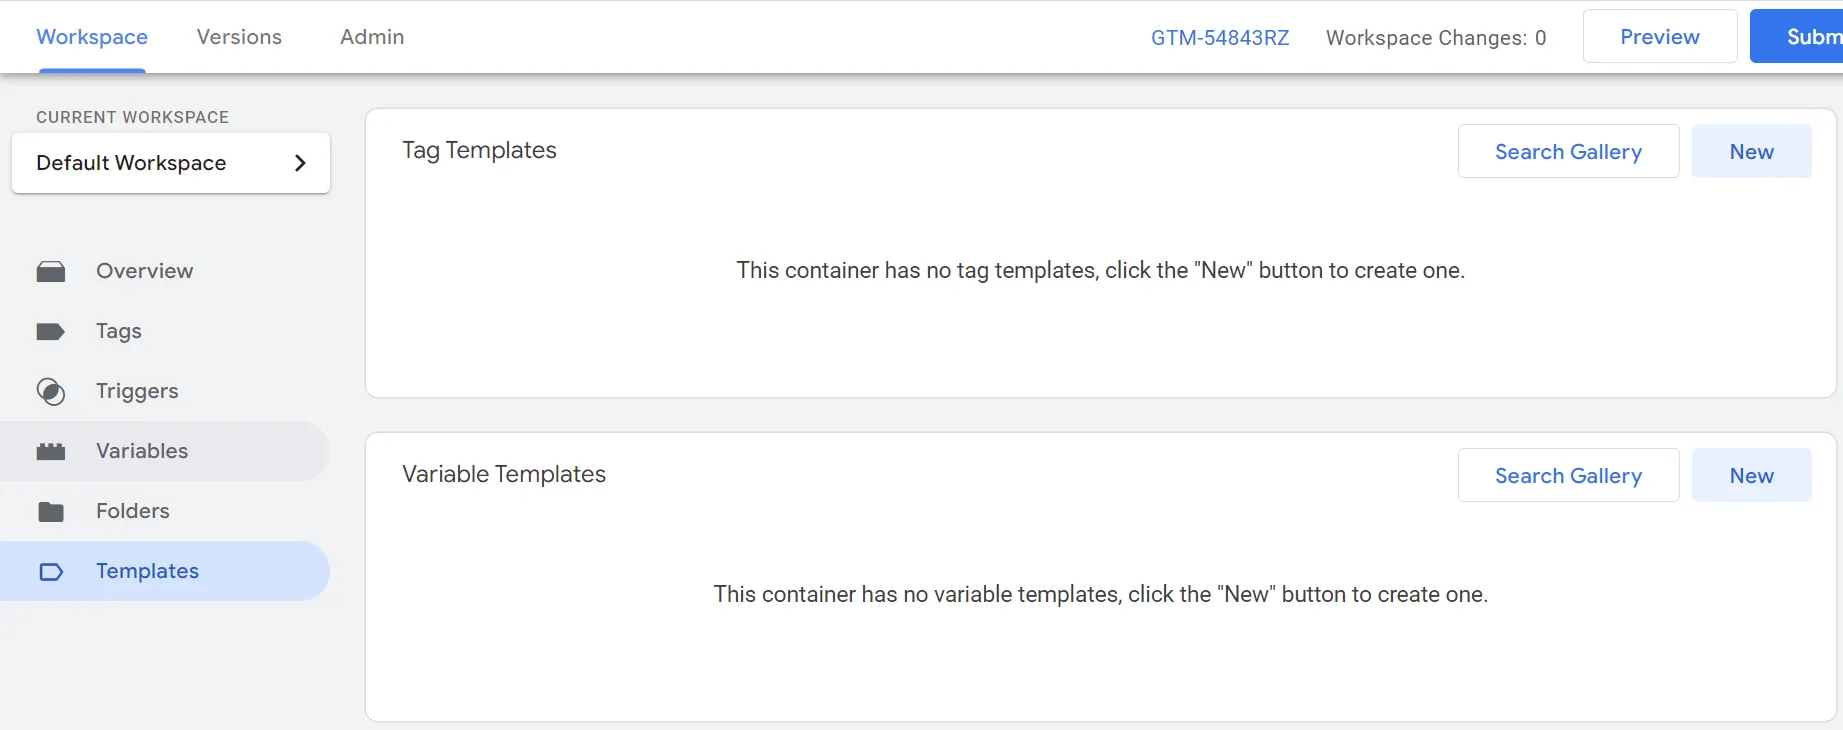
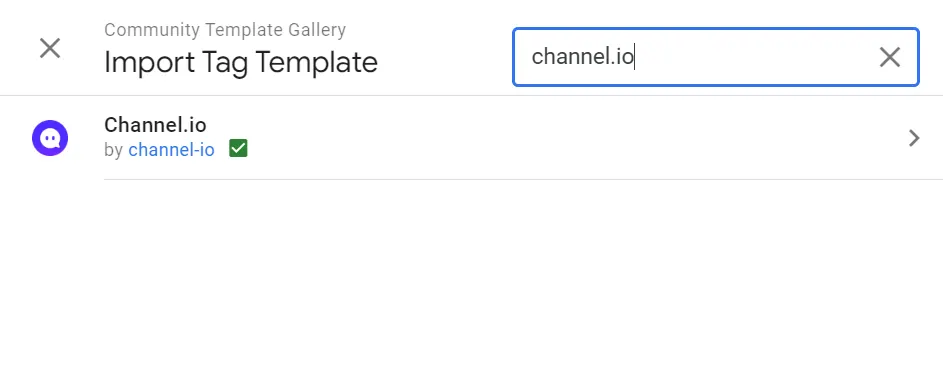
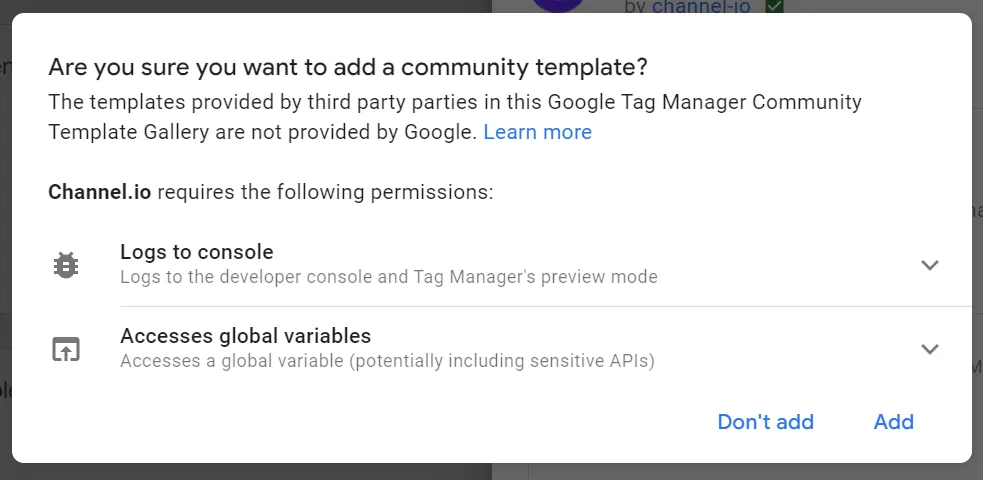
c) Allow permissions before pressing [Add to workspace].
4.
•
•
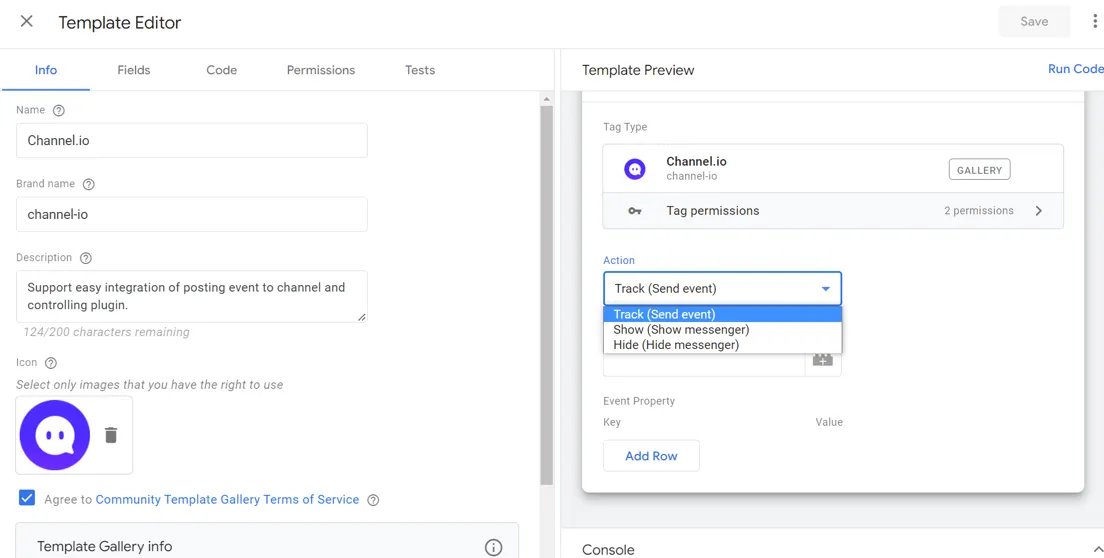
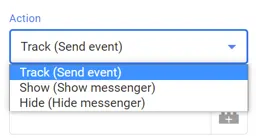
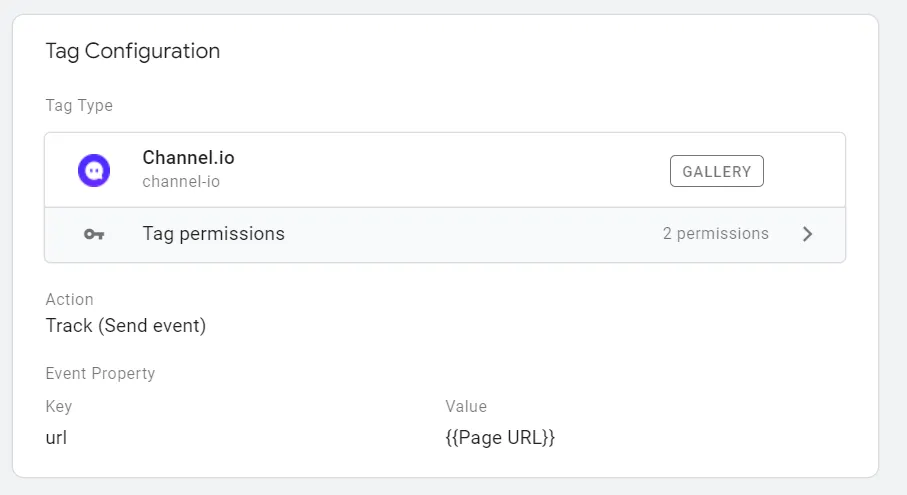
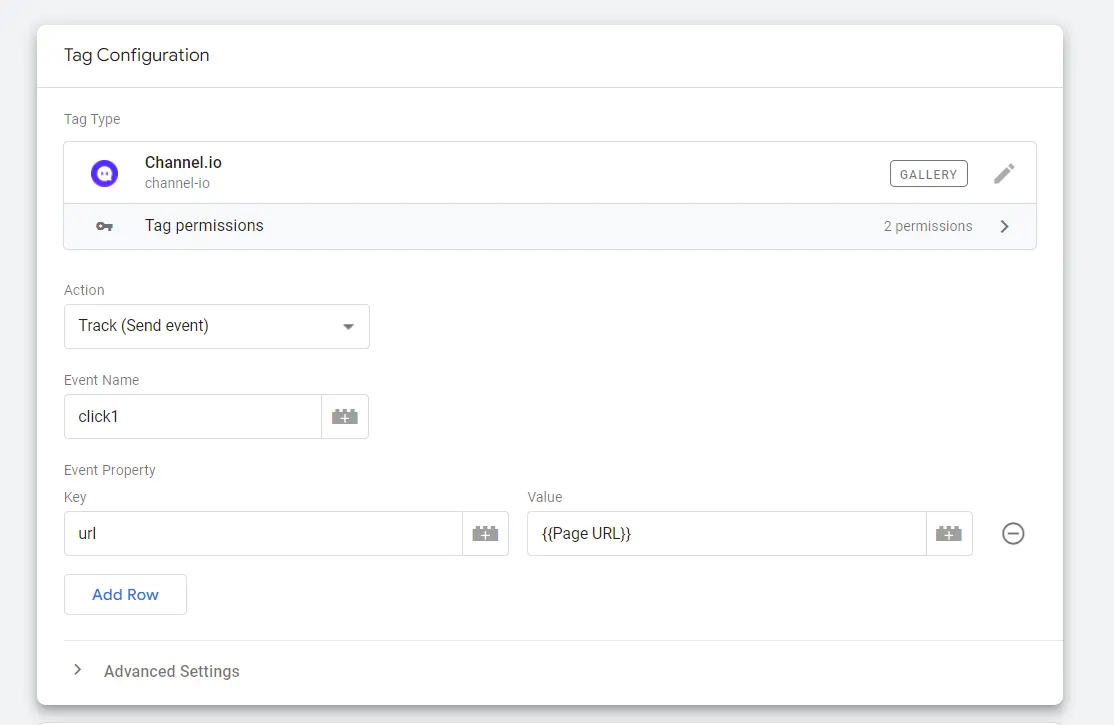
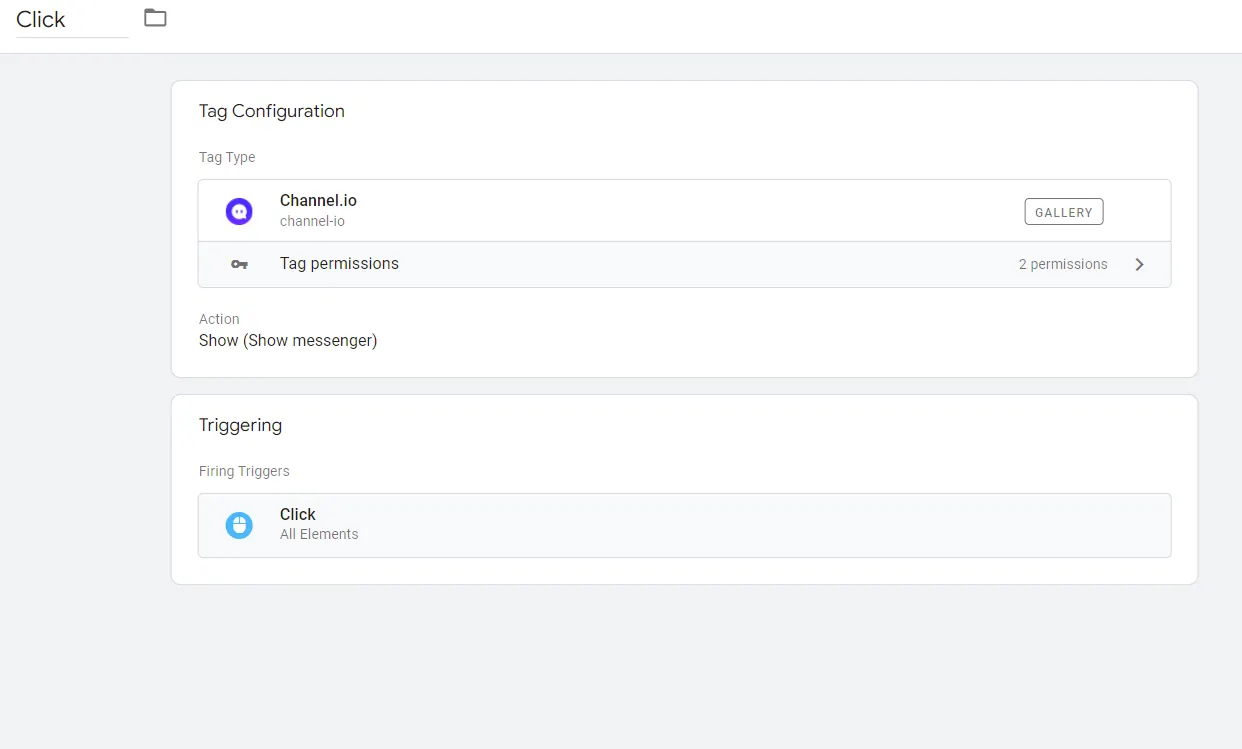
The Channel.io template offers three actions - ‘Track’ (Send event), ‘Show’ (Show messenger) and ‘Hide’ (Hide messenger).
◦
Track (Send Event) ← The most used action
•
•
•
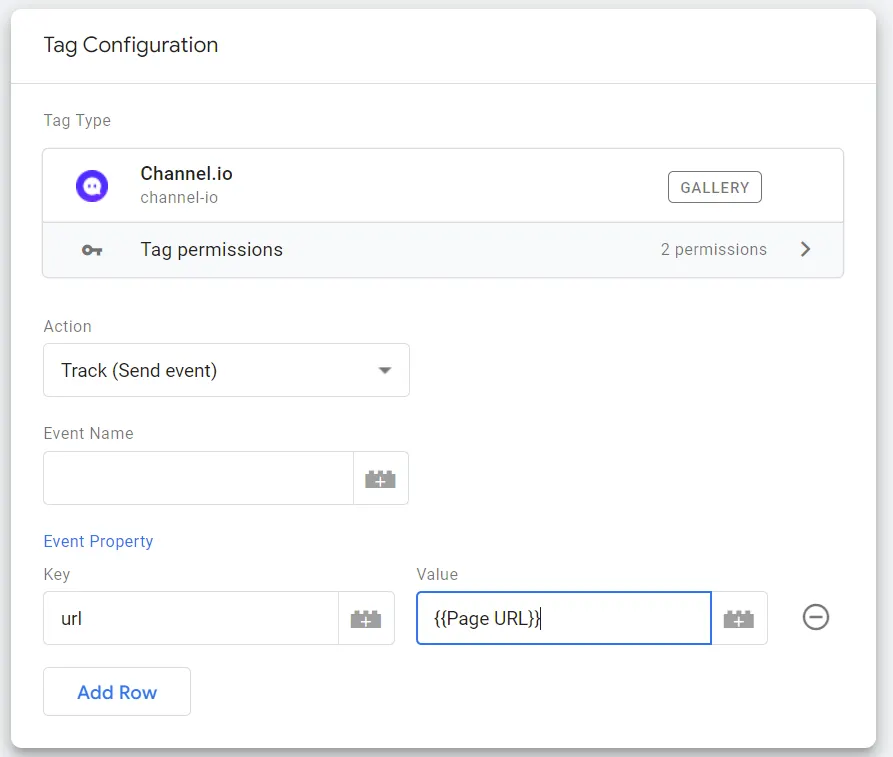
Make sure to include the URL in the ‘Event Property’ field. That way, when a click or scroll event occurs (when GTM sends that information to Channel.io), you can know which page this particular event occurred on.
◦
Show (Show messenger)
▪
▪
◦
Hide (Hide messenger)
▪
This closes the chat history window when a customer performs an action
▪
For example, any opened windows will close when customer B clicks a button
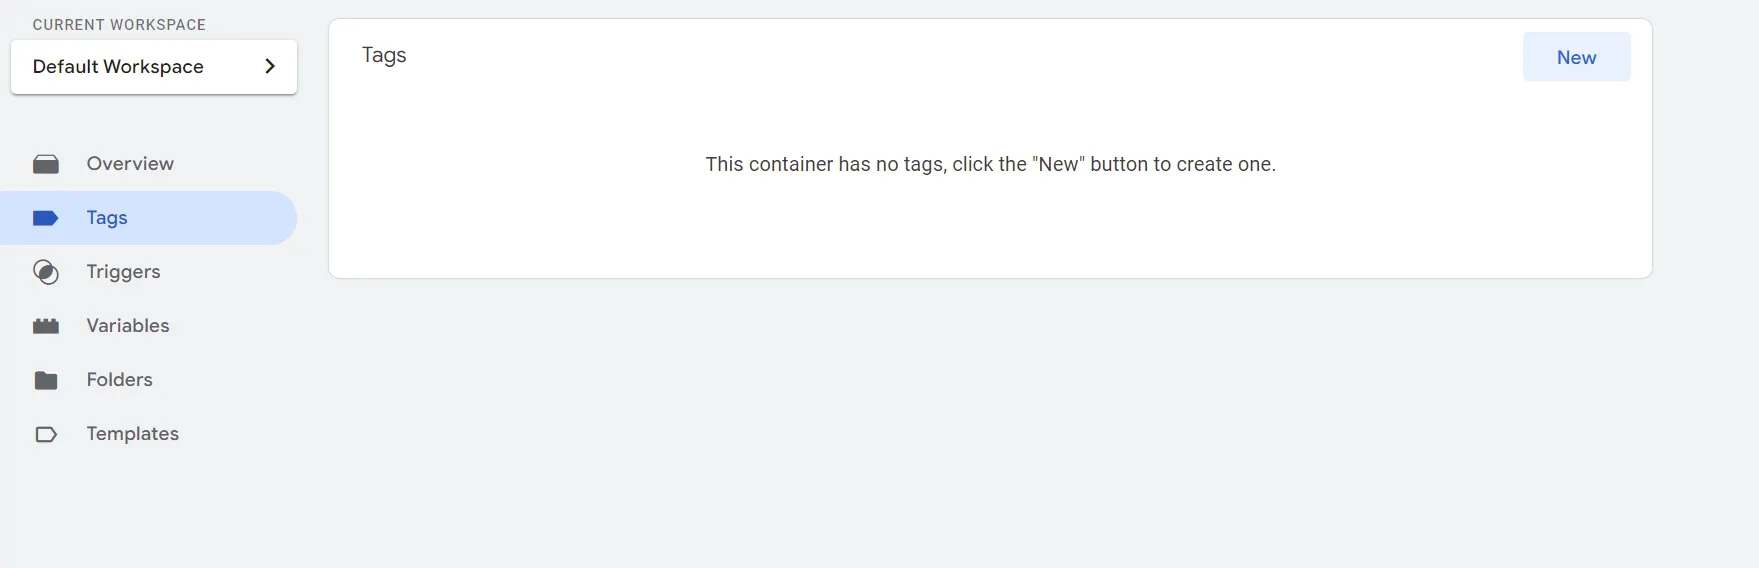
Creating triggers to suit my needs
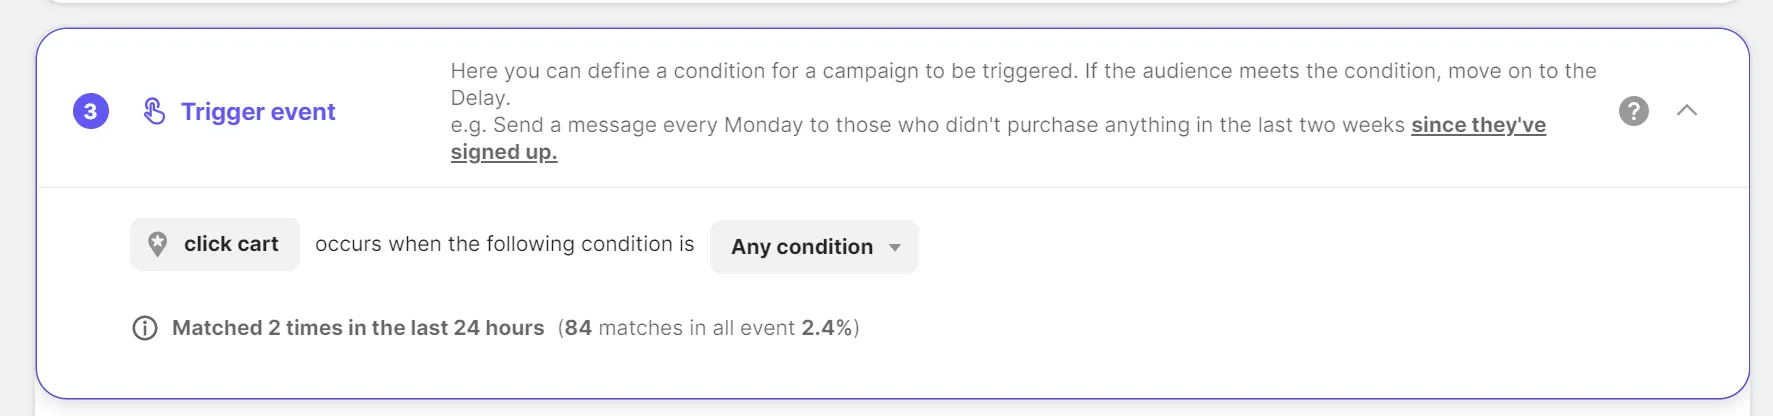
Triggers refer to events that occur as a result of intended/expected actions by customers. (such as triggering a marketing campaign to start).
•
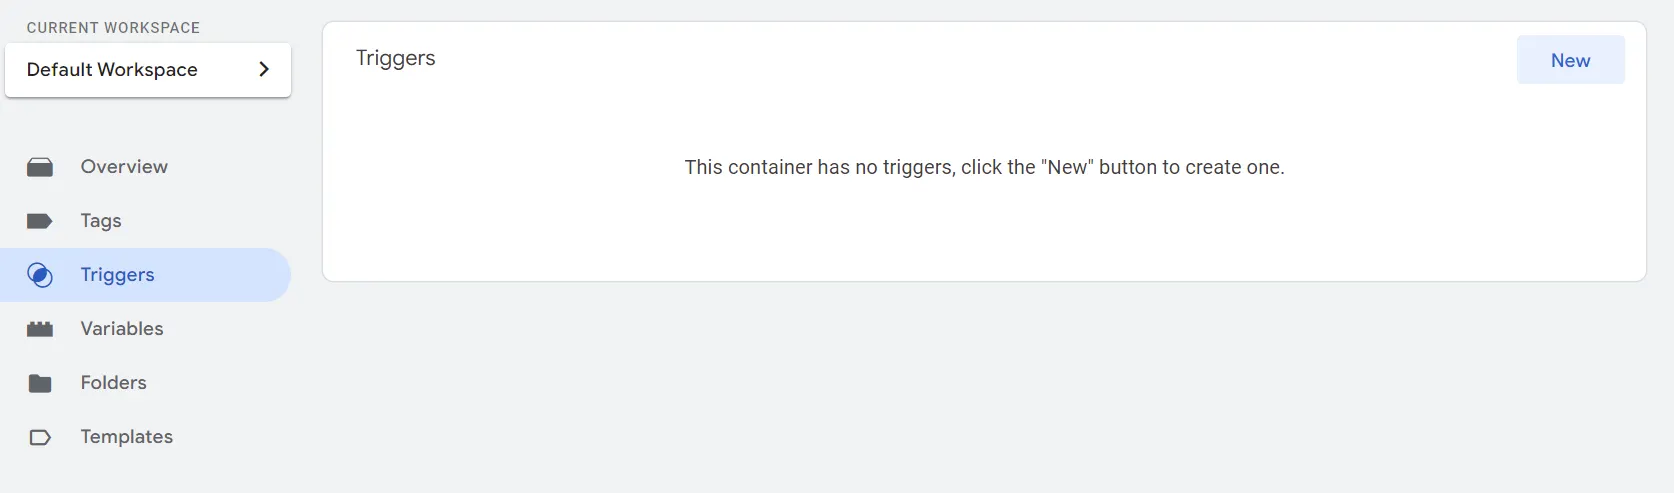
Select [Triggers] on the left menu, and press [Create New]
•
◦
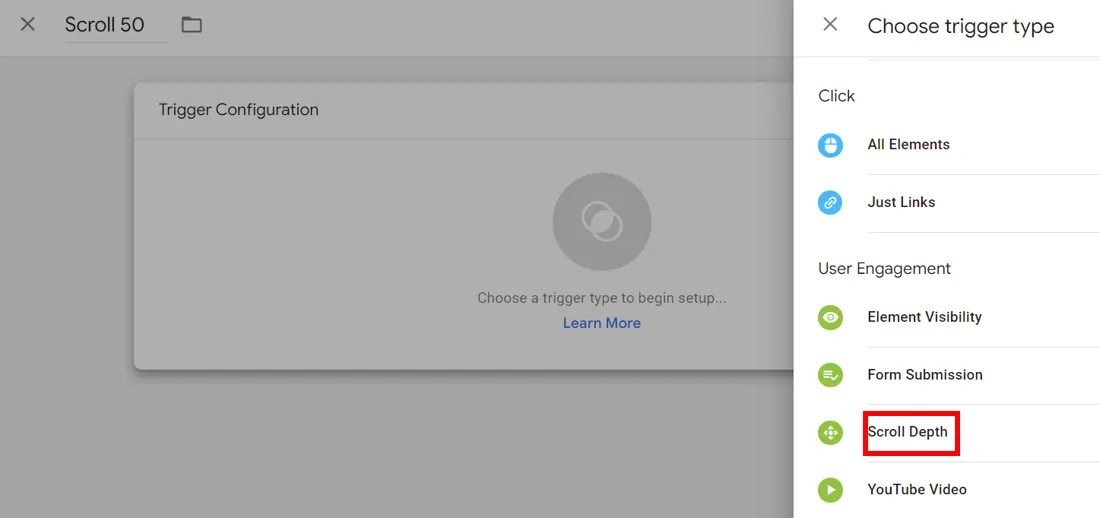
Scroll: Use by tracking customer scrolling actions
◦
Click: Use by tracking customer clicking actions
The Scroll trigger
1.
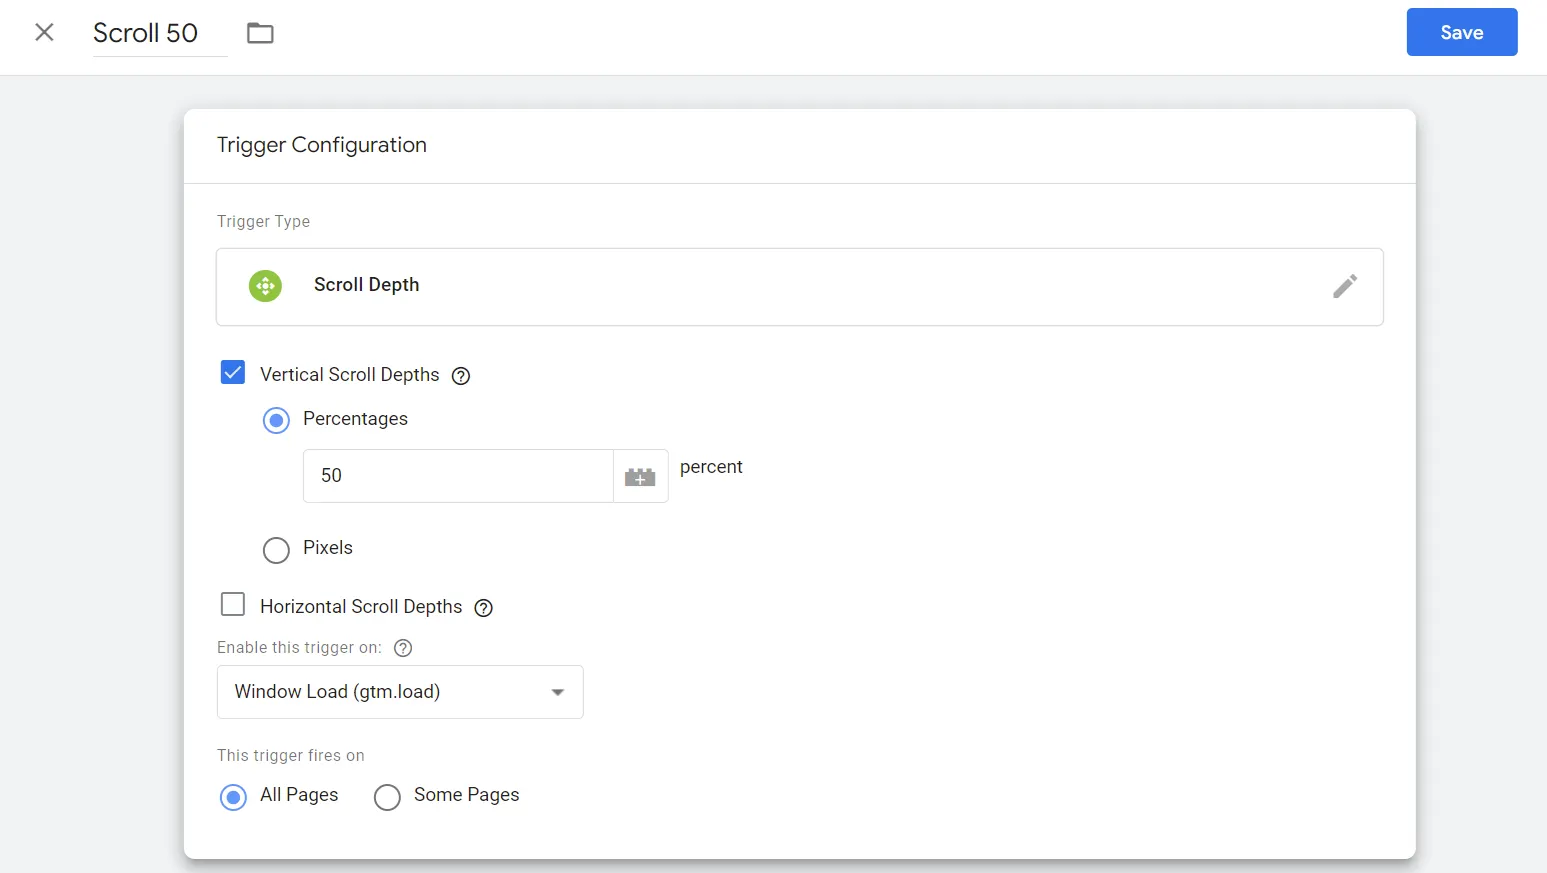
Set a name for the trigger, and in the trigger types, select Scroll Depth.
2.
In Vertical Scroll Depth, set a ratio. Then set ‘Start when window opens’. Click ‘All pages’ to run on all pages (if necessary, you can set it to only selected pages).
3.
By setting this up, a trigger will occur when the customer scrolls down 50% of all pages on your website (if GTM has been integrated).
The Click trigger
1.
To create a click trigger, you need to specify a button to click.
•
Click triggers can be set up in many ways. The most used ones are text (when a certain text is clicked), URL (when a certain URL is accessed), classes (when a certain class field is clicked).
◦
When specifying classes, enter in a complete field without any spaces (e.g. sub_cart)
◦
When specifying text, make sure there aren’t any duplicate words (the same words) in the field
◦
You can also track events by specifying a URL
2.
Check the field that you want to react when being clicked.
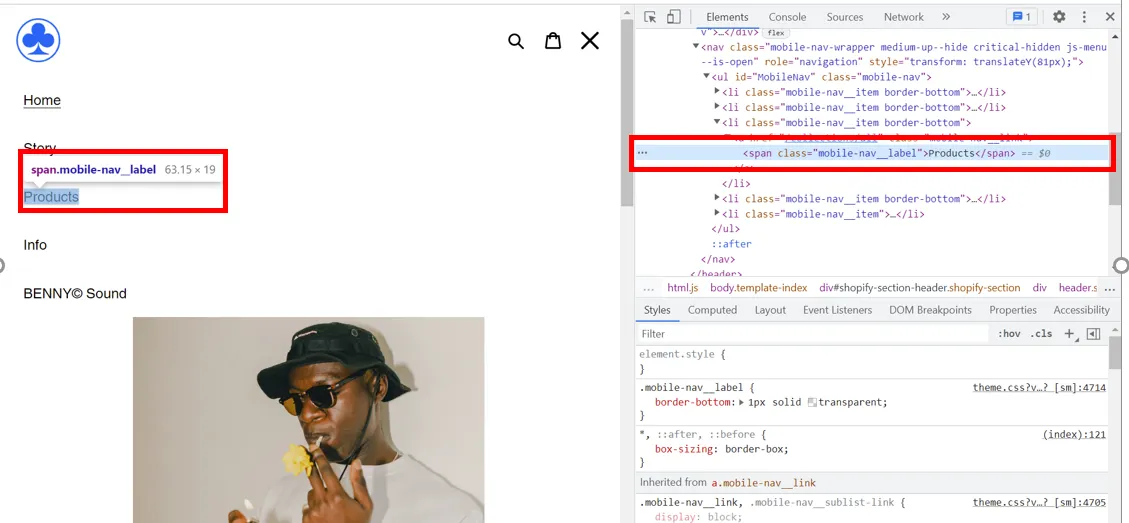
•
Right click on the field, then click [Inspect]; or
•
On [Browser settings] > [More tools] > open [Developer tools] and find in the [Elements] tab
3.
Input the value in the click trigger conditions
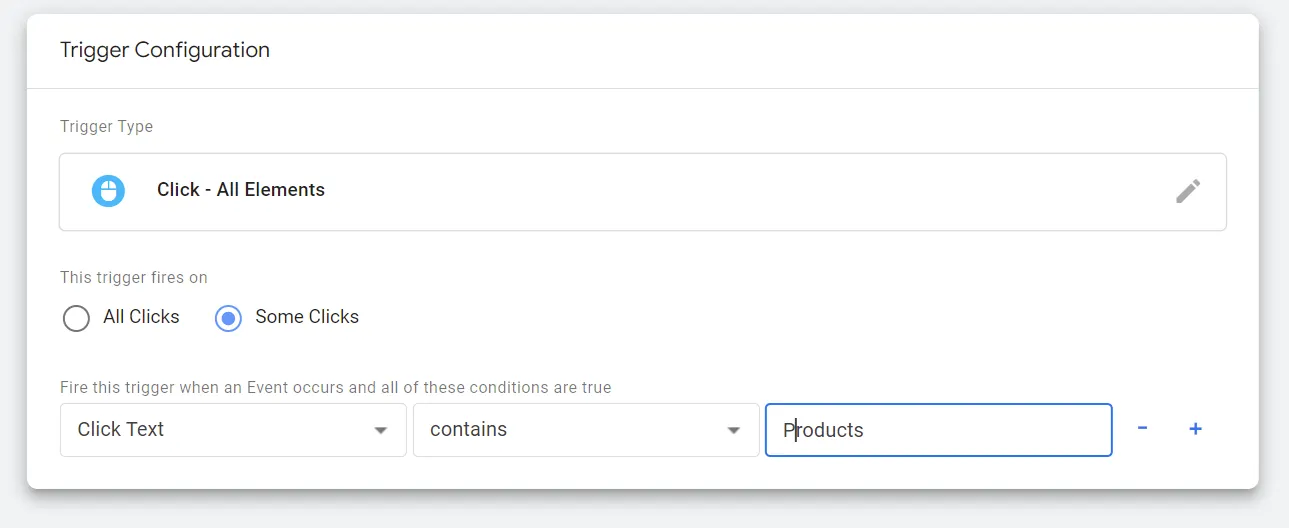
4.
Now, the trigger will occur whenever a customer clicks the text ‘Products’.
Creating and executing a tag
Retaining customers who browse and leave your website
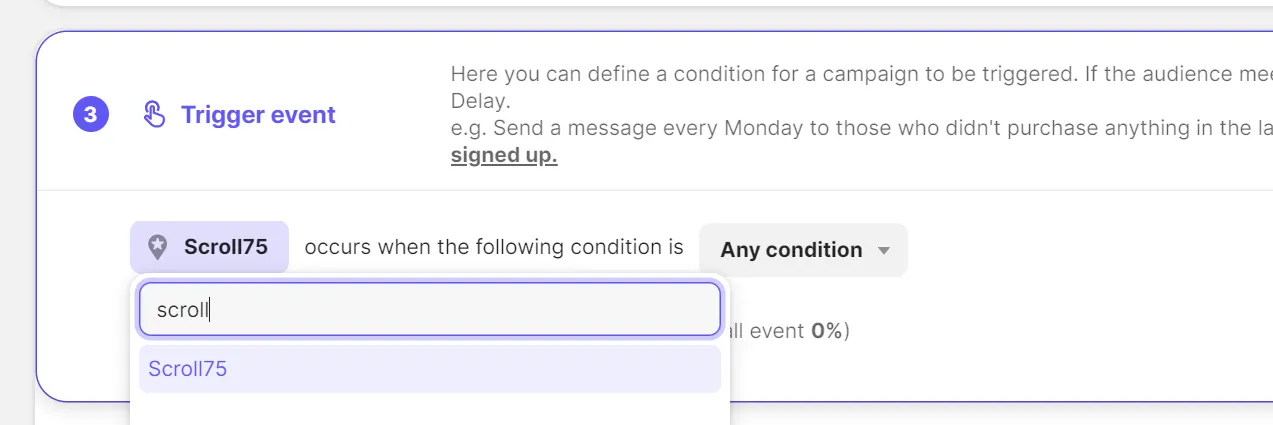
Let’s initiate a chat with a customer when they have scrolled down about 75% of the Product page. It can be something like, “Like this product? Click to buy now - sale ends in 3 hours!”
Creating a Tag from a Scroll trigger
1.
2.
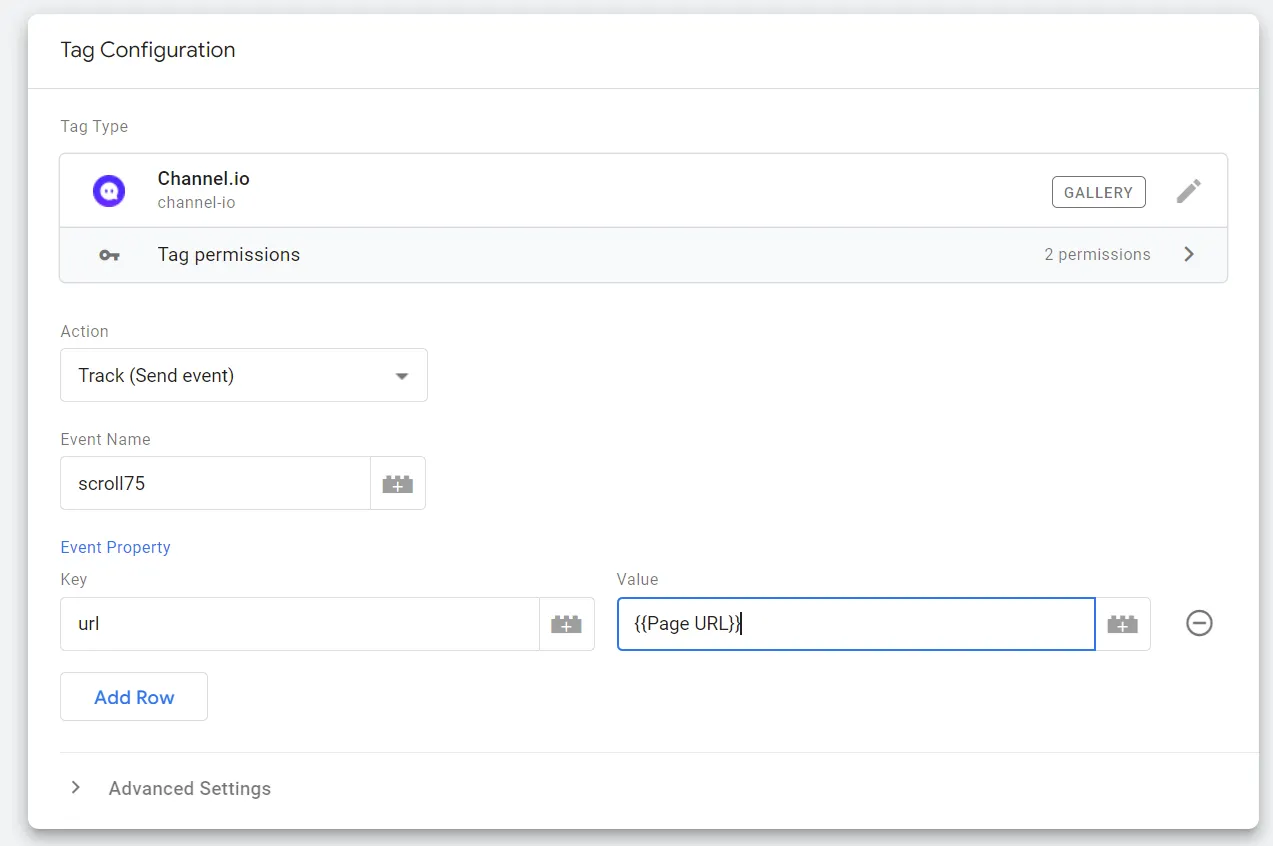
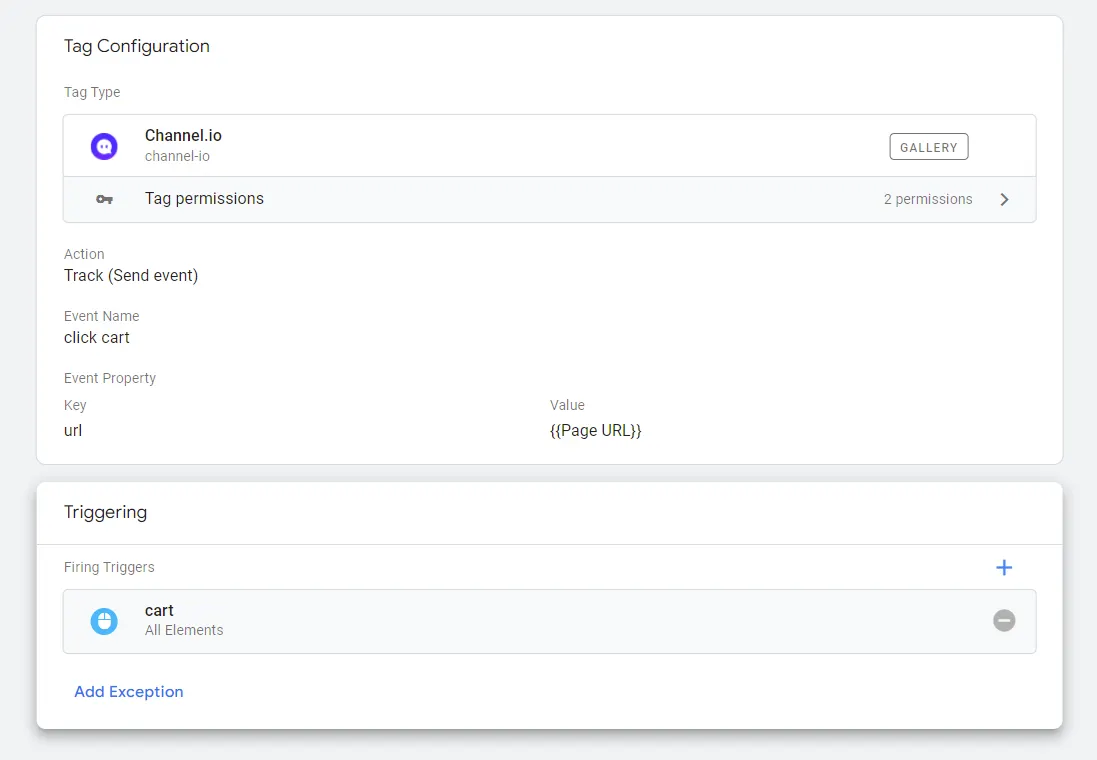
Specify the Action, Event Name and Event Property.
•
Action: select Track (Send Event) to track and send customer action data
•
Event Name: use English characters and numbers only
•
Event Property: type ‘URL’ in the ‘Key’ field and add your page URL in the ‘Value’ field. By doing this, when events are sent to Channel.io, you can get information about what happened on a certain page.
3.
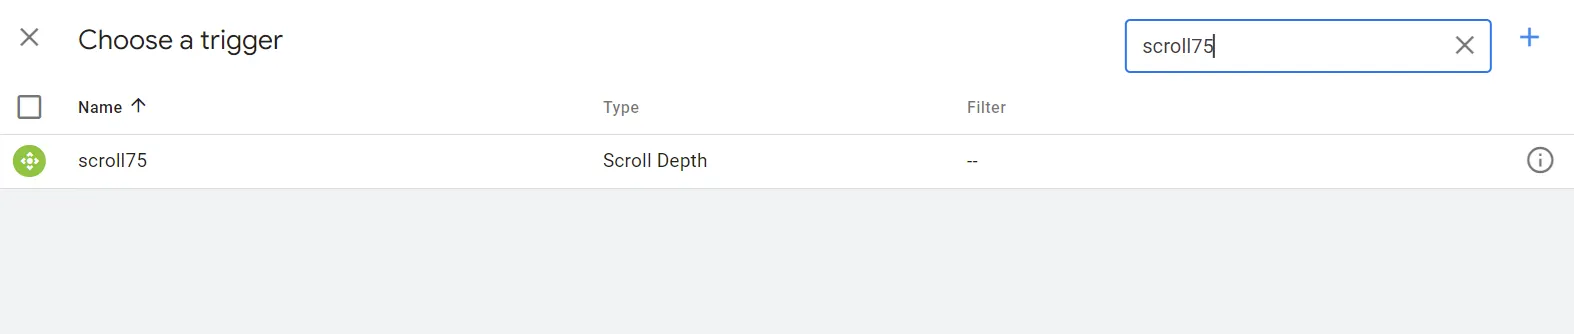
Select the trigger to be linked to the tag. On the list, you will find the Scroll trigger you created previously.
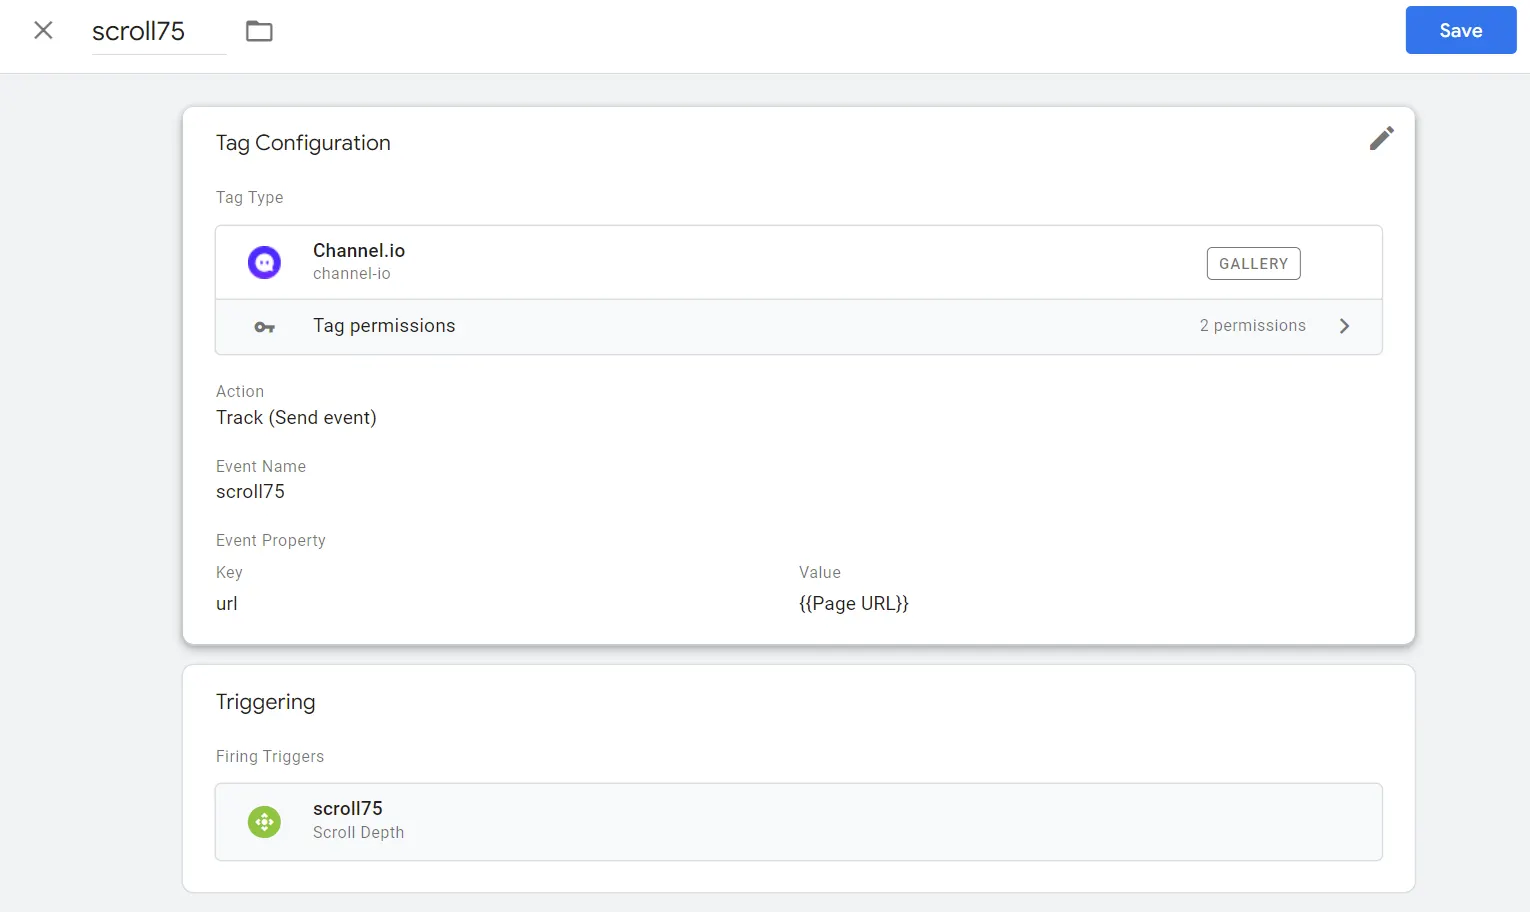
4.
Once you press save, the tag you just created will appear on the Tag list. (Don’t leave just yet - there are still a few more steps to go!)
5.
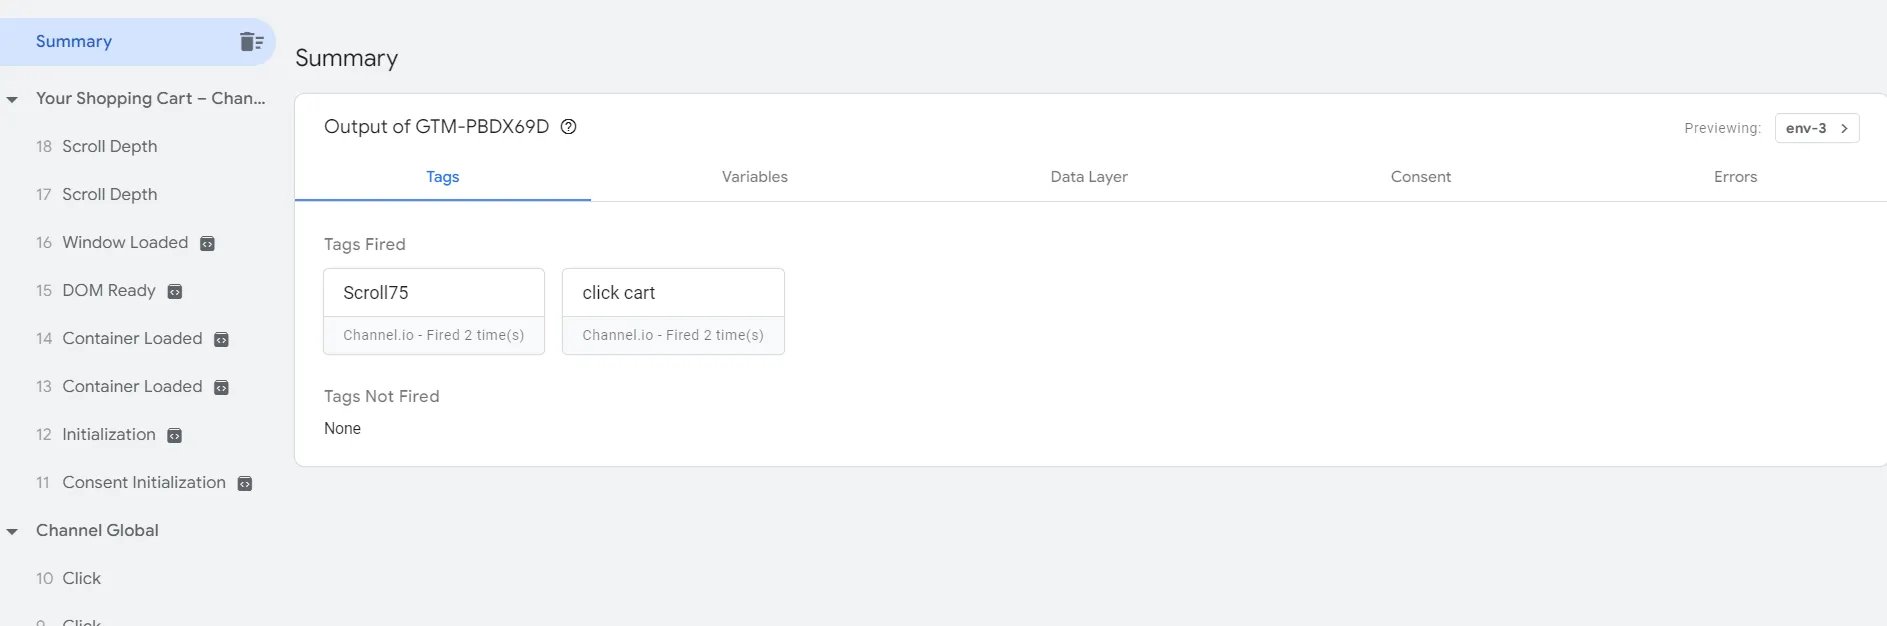
Press Preview to check the Tag status. ‘Tags Not Fired’ means that they haven’t been verified yet, so it’s important that you check this through the Preview.
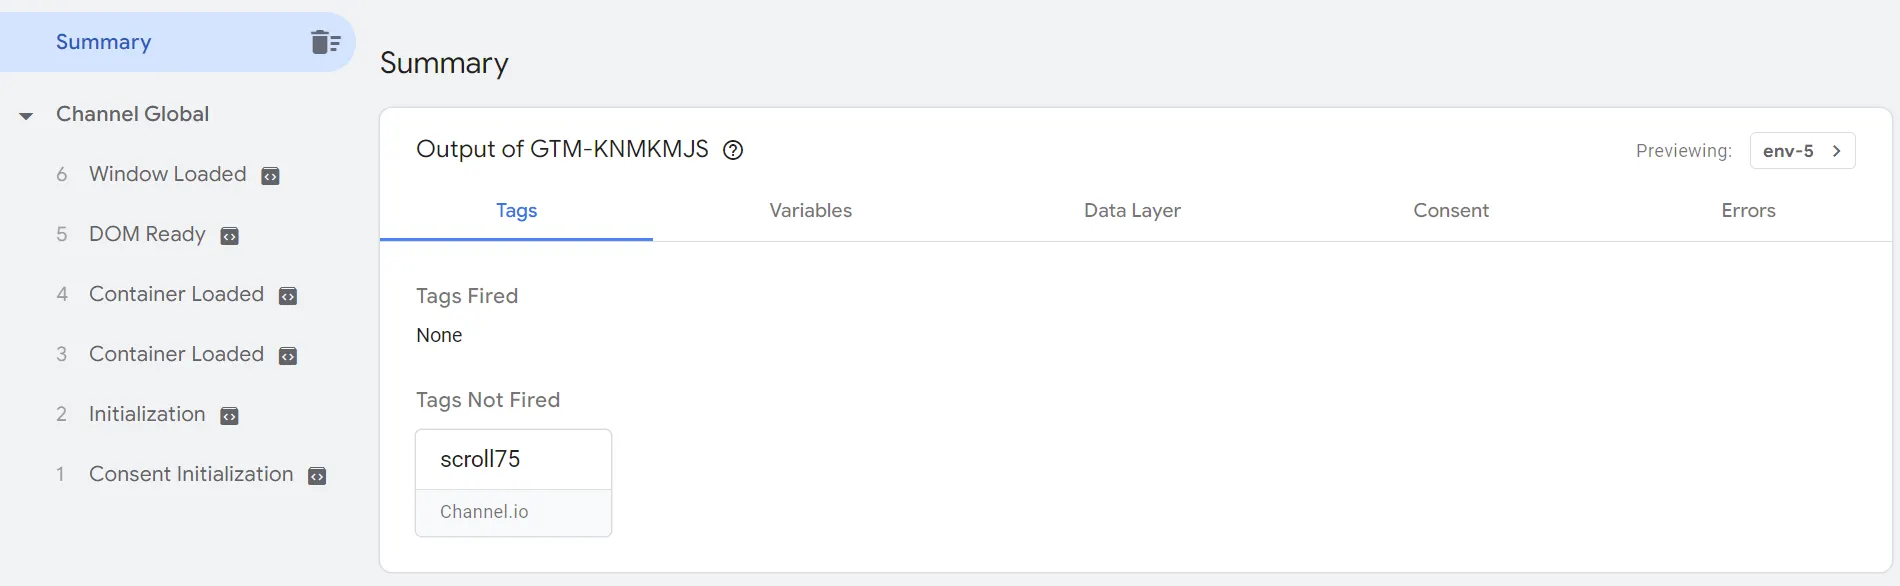
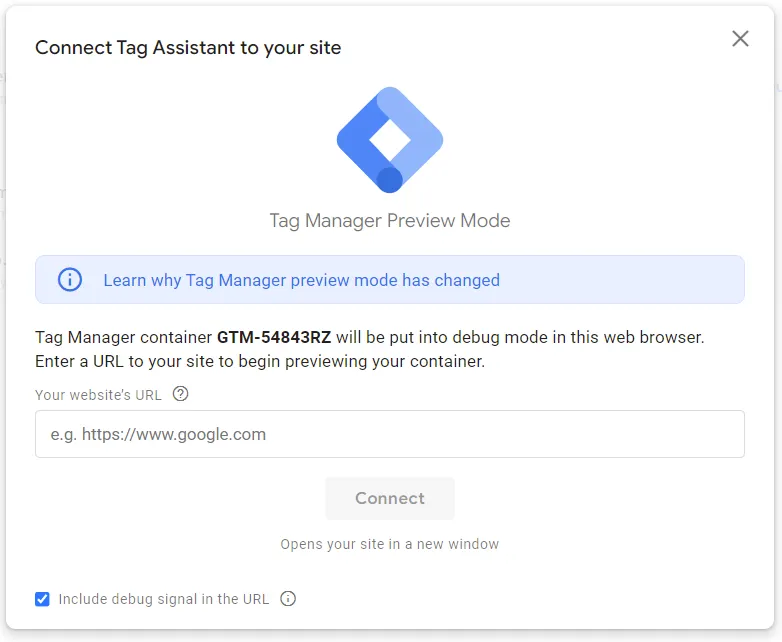
6.
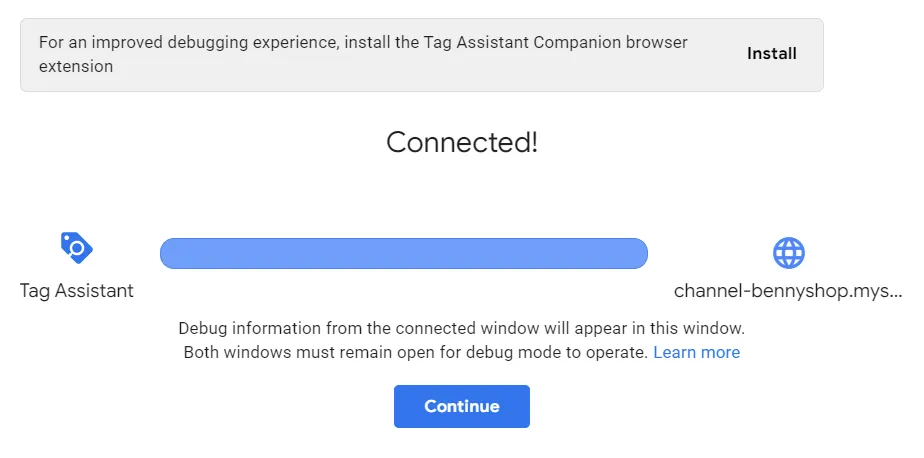
When you want to save changes, clicking Preview will open up a new window(Tag Assistant). Enter the address where Tag Manager is installed (for example, http://000.0000.000.com) and connect.
•
Once the link is complete, a test version of your website will open up in a new window.
•
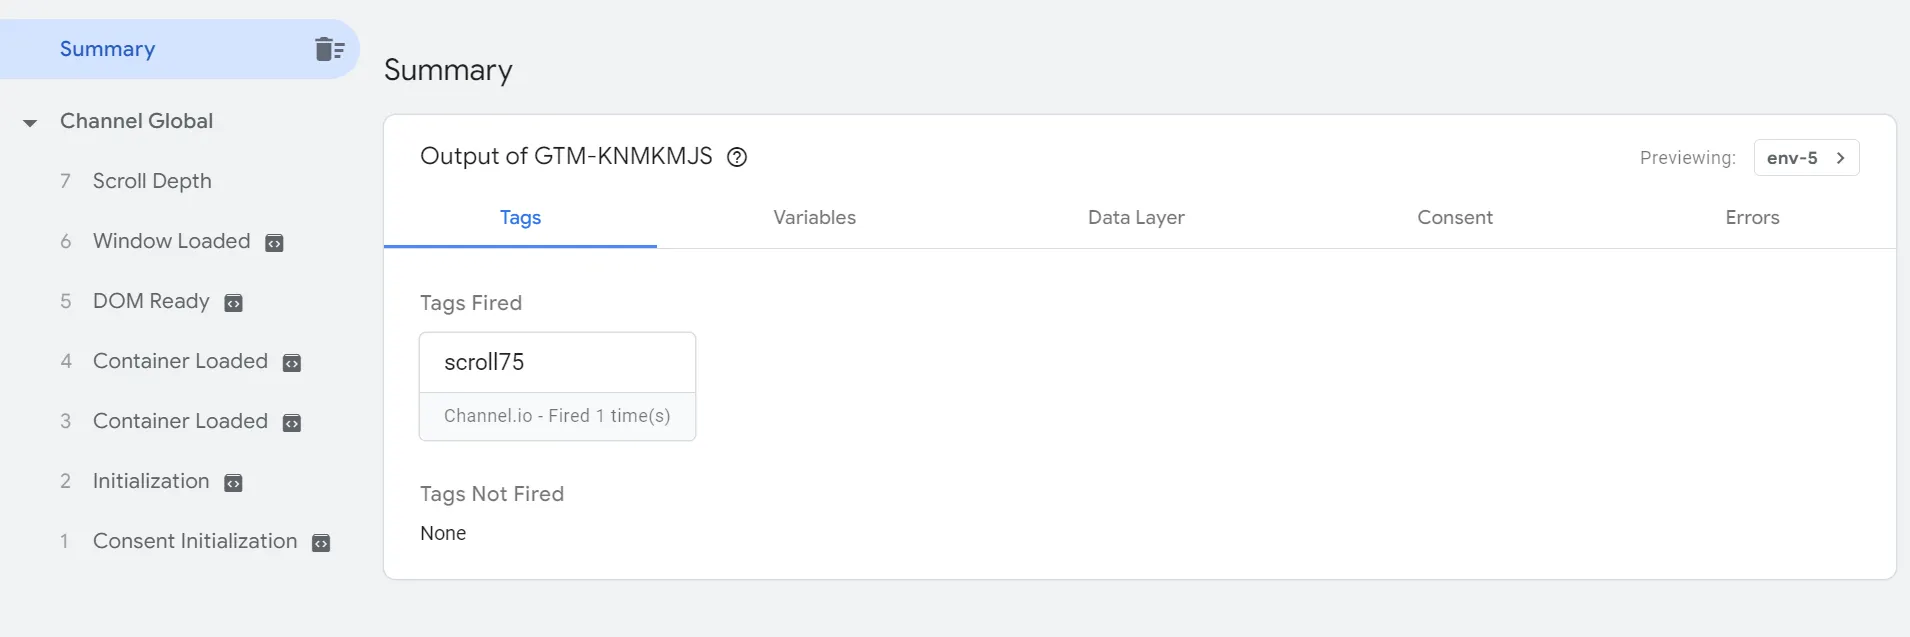
It’s time to test your trigger! If it is working properly, the tag status will change from ‘Tags Not Fired’ to ‘Tags Fired’ (see image below).
7.
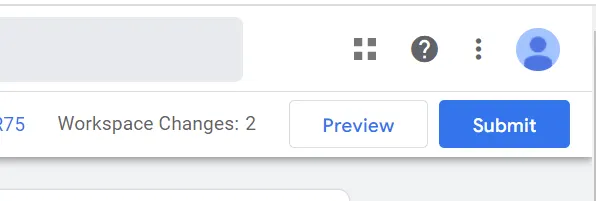
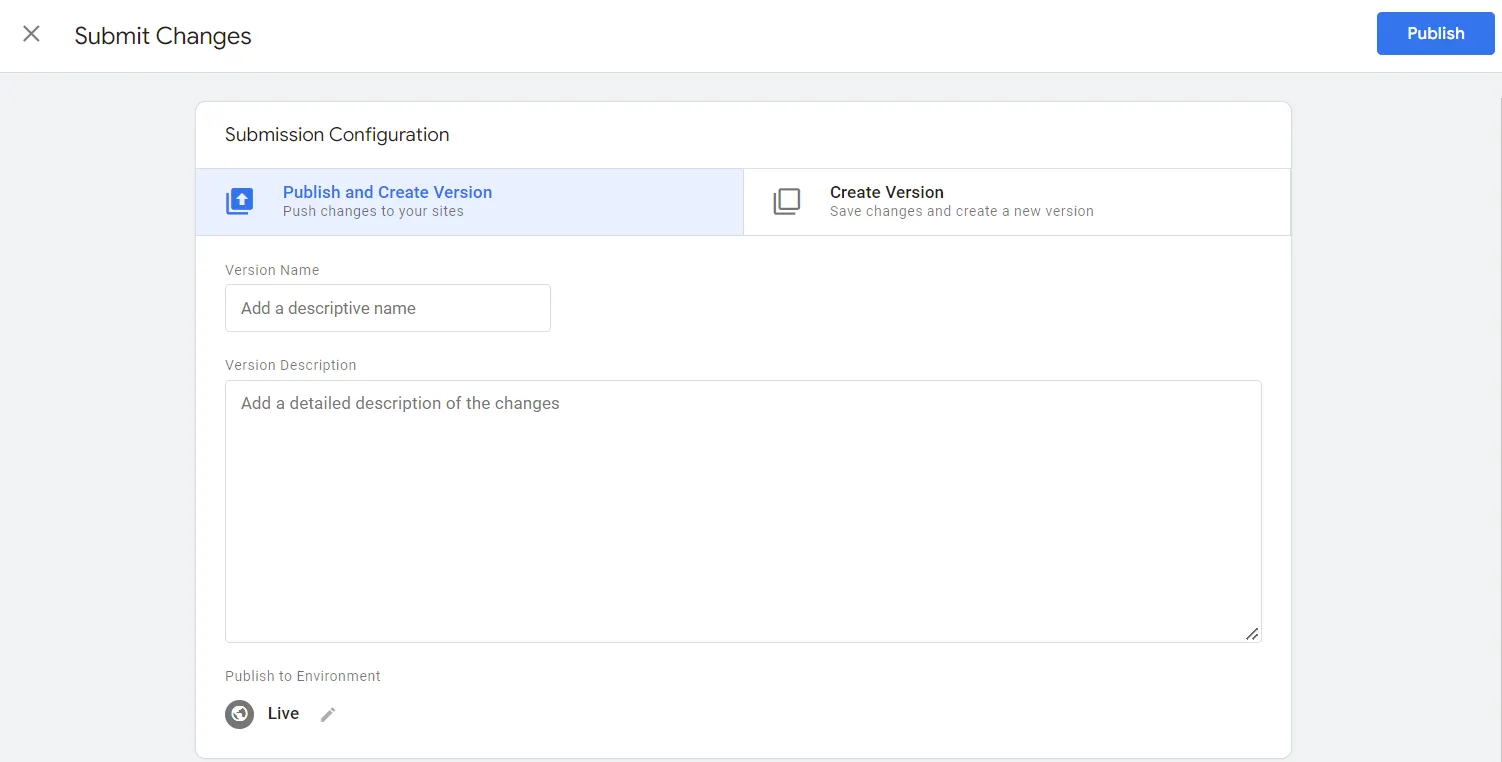
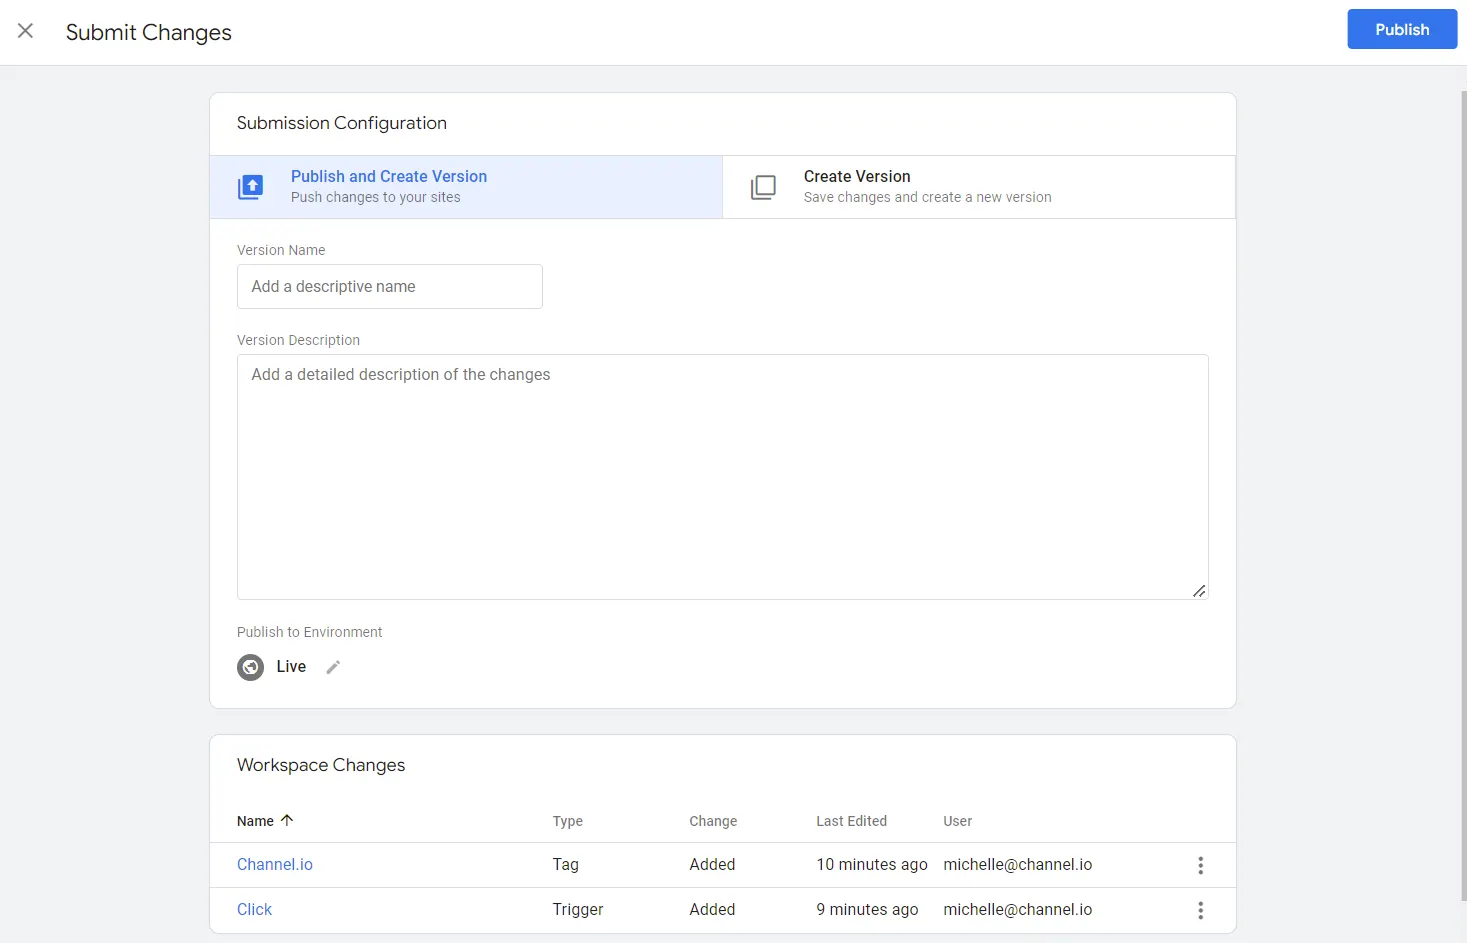
After testing is done, go back to the original tag manager window and press Submit.
•
Input version information as needed and press Publish.
•
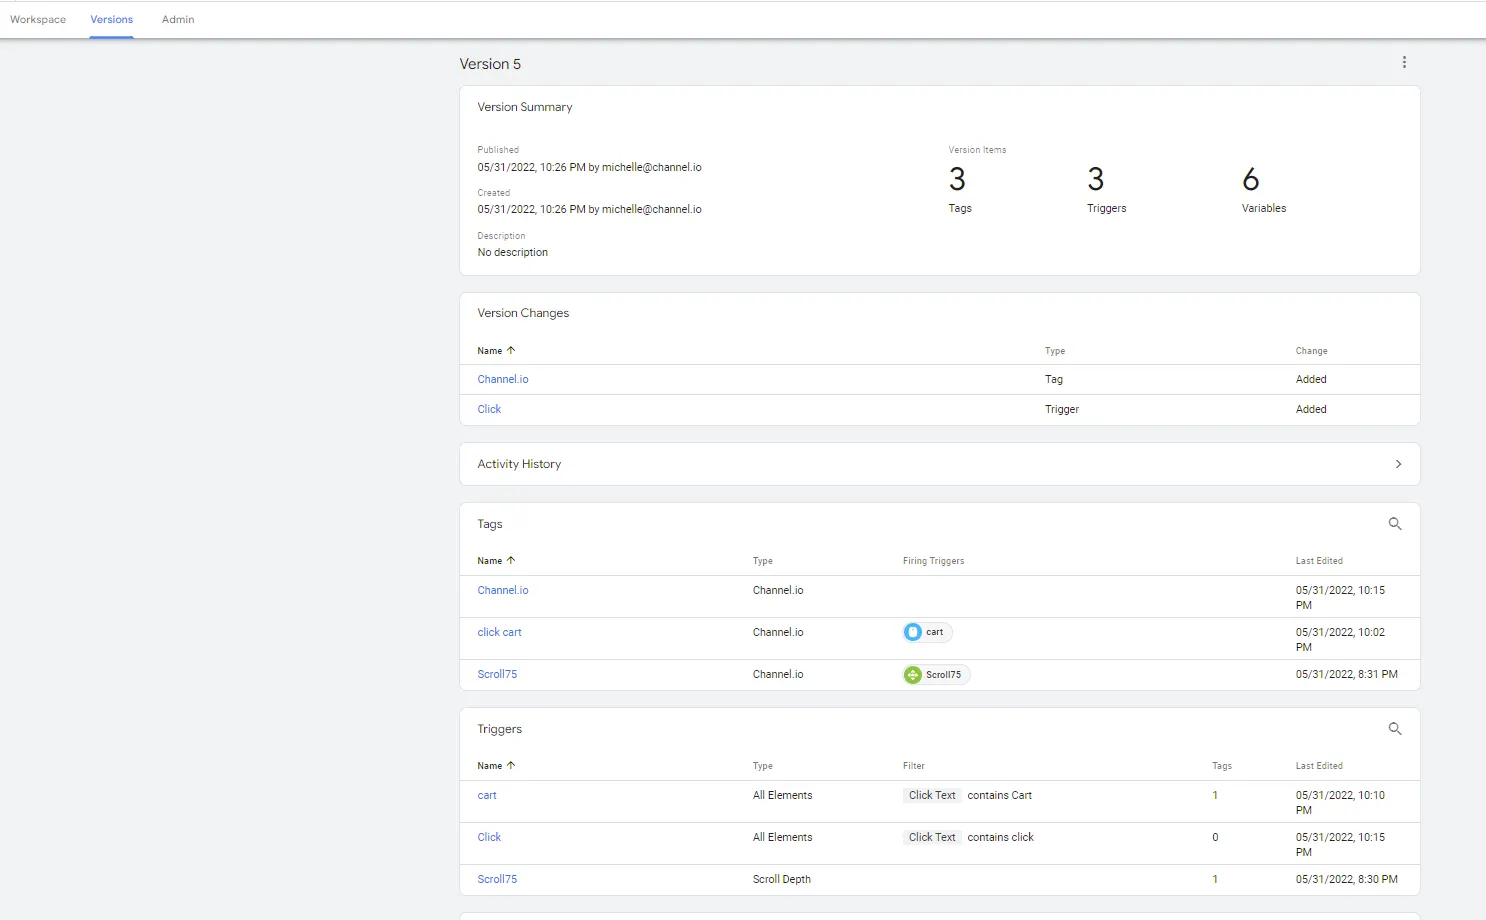
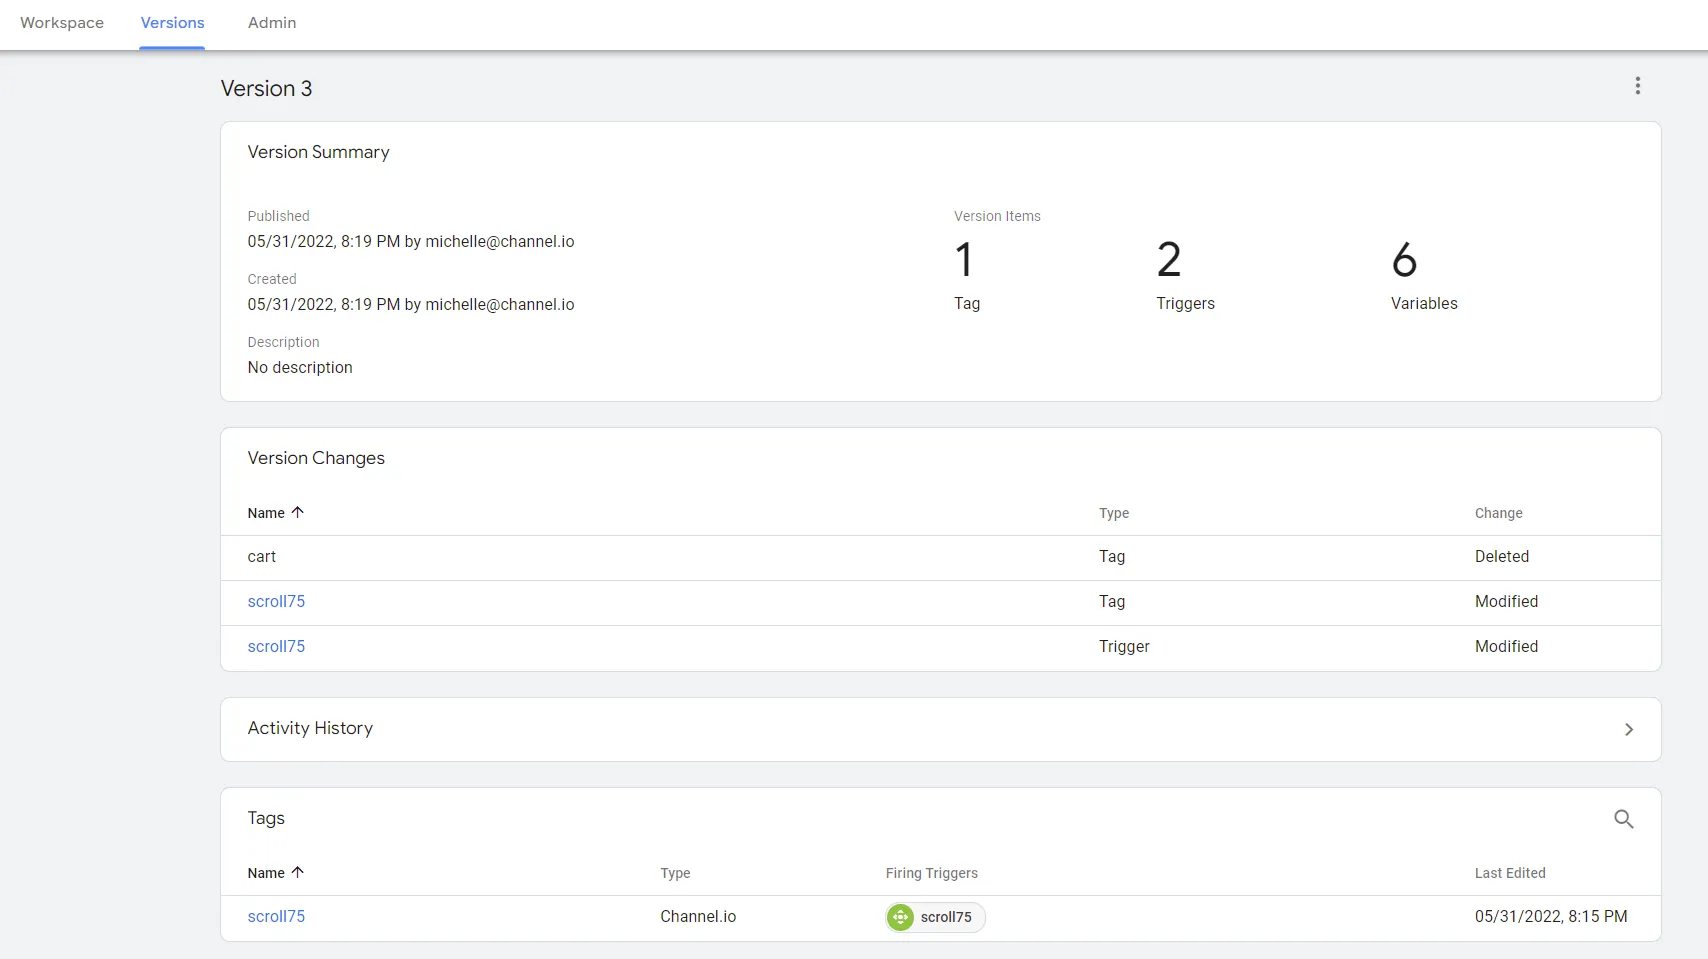
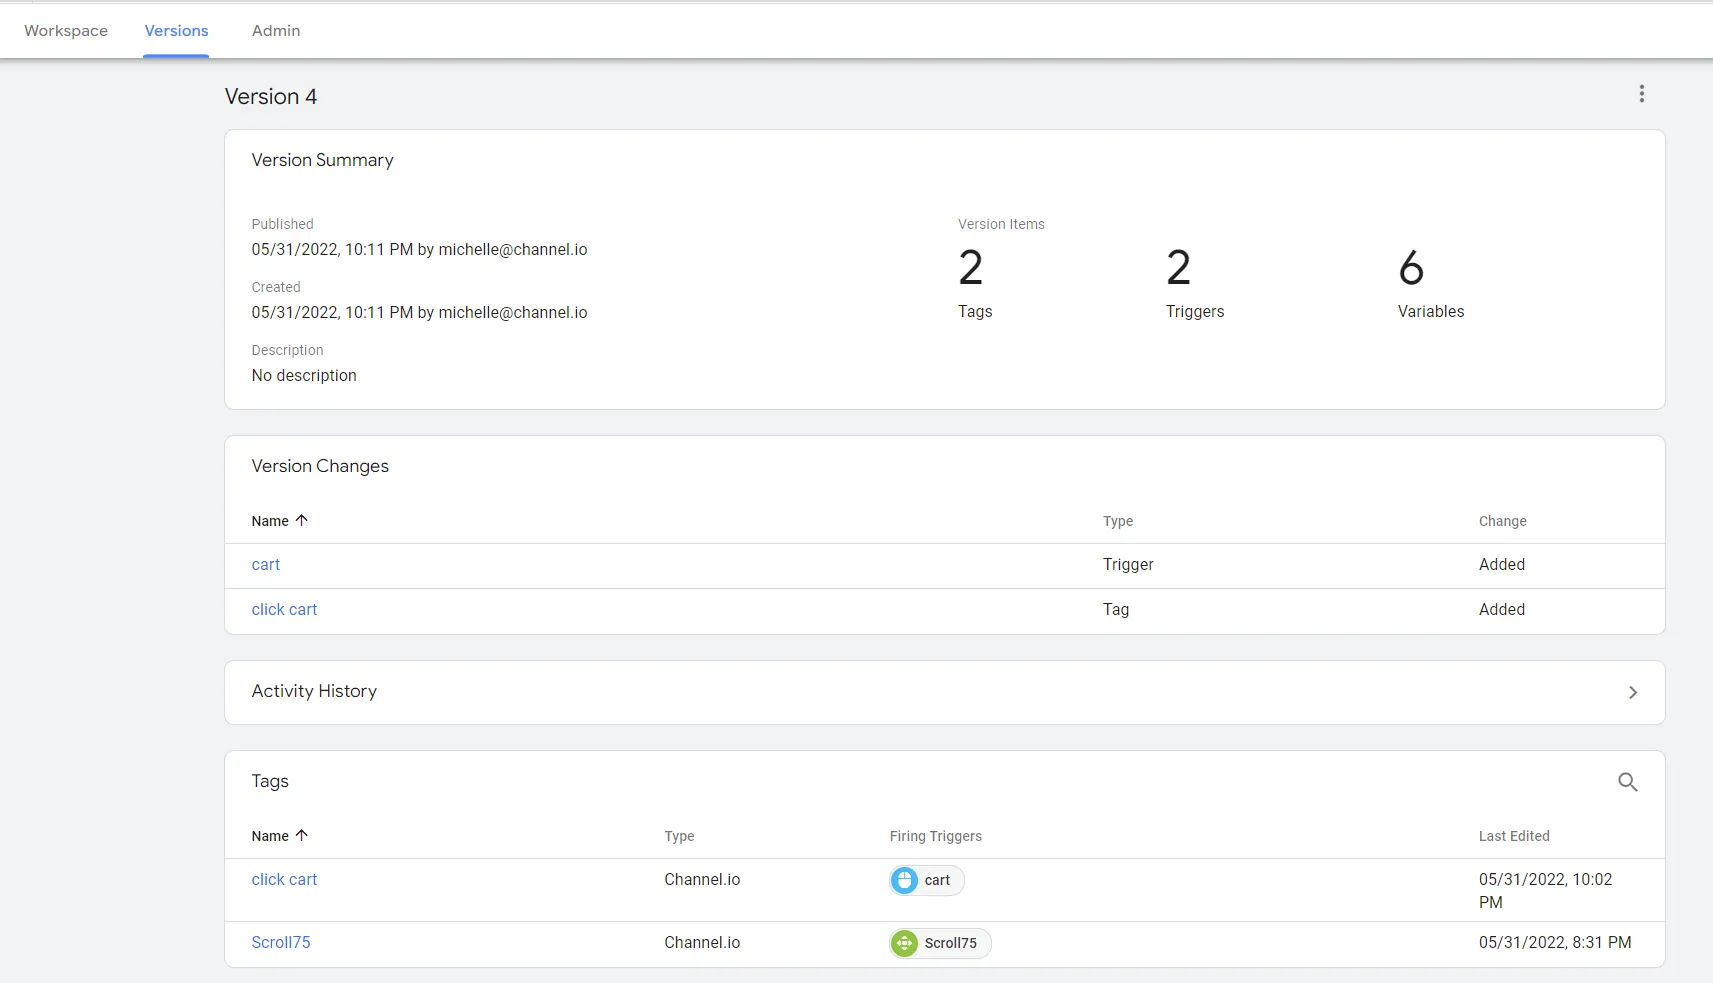
You can also check the tag in your version history.
8.
Integration will take about 10 minutes to complete. During this time, you can test the published trigger action on your website. To be sent to Channel.io and appear on the campaign event list, the relevant action must be performed by either you (through tests) and customers on your website. Remember - the more scrolls, the better.
Depending on the status of GTM and your website, it may take 3~5 minutes at least, or 1~2 hours at most for the event value to appear on the Channel.io event list.
Reaching out to customers who click specific buttons
Let’s initiate a chat with a customer who has clicked ‘Checkout as guest’. It can be something like “Sign up to receive 50% of your checkout amount in Points.”
Creating a Tag from a Click trigger
1.
2.
Specify the Action, Event Name and Event Property.
•
Action: select Track (Send Event) to track and send customer action data
•
Event Name: use English characters and numbers only
•
Event Property: type ‘URL’ in the ‘Key’ field and add your page URL in the ‘Value’ field. By doing this, when events are sent to Channel.io, you can get information about what happened on a certain page.
3.
Select the trigger to be linked to the tag. On the list, you will find the Click trigger you created previously.
5.
After saving, run a test in Preview. If you can see that the action is working on the Preview screen, the tag card will move from ‘Tags Not Fired’ to ‘Tags Fired’ (see image below).
6.
Next, press Submit and then Publish.
7.
Integration will take about 10 minutes to complete. During this time, you can test the published trigger action on your website. To be sent to Channel.io and appear on the campaign event list, the relevant action must be performed by either you (through tests) and customers on your website. Remember - the more clicks, the better.
Opening a chat window by clicking a button
Let’s initiate a chat with a customer who looks to be needing some help. It could be something like “It seems like you need some assistance! How can I help?”
Creating a Open Chat Window Tag from a Click trigger
1.
The action for Open Chat Window is Show (Show messenger).

2.
Find and connect the specified trigger for the field to be clicked on.
•
When specifying classes, enter in a complete field without any spaces (e.g. sub_cart)
•
When specifying text, make sure there aren’t any duplicate words (the same words) in the field
•
You can also click on any other button to open up the chat window by entering in the Channel.io plugin link URL
3.
You can Preview this action and check the tag is working. After pressing Submit and Publish, don’t forget to test the action on your website (more than once is recommended!).
Let’s send out campaign messages to customers using newly created events!
To learn more about setting up a marketing campaign, click here
To learn more about setting up a marketing campaign, click hereAdditional notes
Always press Preview and Submit to save any changes.
•
Press Preview after making any changes.
•
After pressing Preview, a window will be displayed for you to integrate the Tag Manager with your website. Enter your website URL and press Connect.
•
This opens your website in a new window, and at the bottom of your screen, it will show the connection as successful.
•
Clicking Finish or closing the new window may cause a disconnection and an error message.
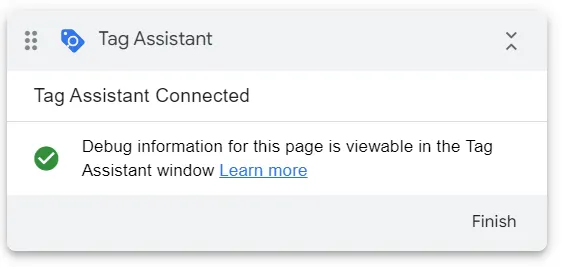
→ Make sure to run test previews without clicking anything or closing any windows.
•
•
Press Submit and Publish once you have checked that all actions are working in the Preview mode.
•
This version will be saved when you press Submit and Publish.